Running a Shopify store means juggling hundreds of transactions, sales, refunds, shipping, fees, and taxes, all bundled into a single payout. When that payout hits your bank account, it rarely matches what Shopify reports inside your dashboard. The result is a reconciliation nightmare in QuickBooks.
QuickBooks Online now offers a dedicated app for Shopify, called QuickBooks Online Connector by Intuit. The app syncs Shopify orders, products, and customers directly into QuickBooks, but it focuses on order-level syncing, not payout reconciliation. That means you’ll still need to manually reconcile deposits if you use multiple gateways like PayPal or Klarna.
For e-commerce sellers who want full automation, Link My Books offers a cleaner integration. It connects Shopify directly to QuickBooks Online, imports each payout as a single summarized journal entry, separates sales, fees, refunds, and taxes, and matches them to your bank feed automatically.
In this guide, you’ll learn both methods:
- How to connect Shopify to QuickBooks manually or via the official app
- How to do it the easy way, by automating the entire process with Link My Books
Key Takeaways from this Post
When sellers try to reconcile manually, the differences lead to VAT errors, duplicate income, and long bookkeeping hours.
The QuickBooks Online Connector app can sync Shopify orders and products, but it doesn’t handle multi-gateway or multi-currency reconciliation well.
Link My Books automates the process completely - it imports Shopify payouts as clean summaries, separates fees, refunds, and taxes correctly.


Common Problems Shopify Sellers Face Connecting With QuickBooks
Even after connecting Shopify to QuickBooks Online, sellers often discover that the numbers don’t match their bank deposits. The issue isn’t with Shopify or QuickBooks individually - it’s with how the two systems communicate. Shopify groups transactions into payouts, while QuickBooks records deposits as standalone amounts. Without proper mapping, reconciliation becomes guesswork.
Here are the most common accounting headaches sellers report:
- COGS miscalculation: QuickBooks can’t automatically link your product cost data from Shopify unless you upload and map each SKU manually. As a result, your profit margins are inflated or inconsistent.
- Regional tax errors: Shopify collects VAT, OSS, or sales tax depending on the customer’s location. QuickBooks might apply another tax rule on top of it unless you adjust mappings. This double taxation can lead to overreporting and HMRC or IRS compliance issues.
- Hidden fees and netted payouts: Shopify deducts gateway fees, refunds, and adjustments before sending payouts. QuickBooks only sees the net deposit - so unless you import a detailed breakdown, your books will show less income and no expense entries.
- Settlement periods spanning multiple months: Shopify’s payouts can include orders from different months, especially if you’re on a multi-day payment schedule or cross-border setup. That makes it nearly impossible to close books cleanly by month-end.
- Manual data-entry errors: Sellers who rely on CSV exports often mislabel fees, refunds, or VAT lines. It’s easy to duplicate entries or assign transactions to the wrong account.
- Bank reconciliation mismatches: The payout total from Shopify rarely matches the sum of recorded transactions in QuickBooks, forcing you to manually find differences - often due to missing gateway or refund data.
All these issues stem from one core problem: Shopify reports gross activity, while QuickBooks records only net deposits. Unless a tool translates one into the other, the two systems will never balance. Link My Books automates that translation - summarizing payouts, categorizing every component, and posting it into QuickBooks so your books reconcile perfectly with one click.
How to Integrate Shopify With QuickBooks Online (The Easy Way With Link My Books)

The easiest and most accurate way to connect Shopify to QuickBooks Online is through Link My Books, which automates your entire accounting workflow.
Here’s how it works step by step:
- Follow our Pre-Integration Checklist
- Connect Shopify and QuickBooks via Link My Books
- Complete the Setup Wizard
- Sync Shopify Settlements to QuickBooks
- Enable Ongoing Automation
Step #1: Pre-Integration Checklist
Before connecting, make sure you have:
- QuickBooks Online login credentials (you’ll authorize through Intuit’s secure OAuth screen).
- Shopify admin access for the store you want to connect.
- VAT registration details (if you sell in the UK or EU, this ensures correct OSS mapping).
- Payment gateways identified (Shopify Payments, PayPal, Klarna, etc.).
- Inventory and COGS tracking method selected (FIFO/LIFO).
Optional: Historical data range you want to import (Link My Books supports up to 24 months of backdated settlements depending on your plan).
Step #2: Connect Shopify and QuickBooks via Link My Books
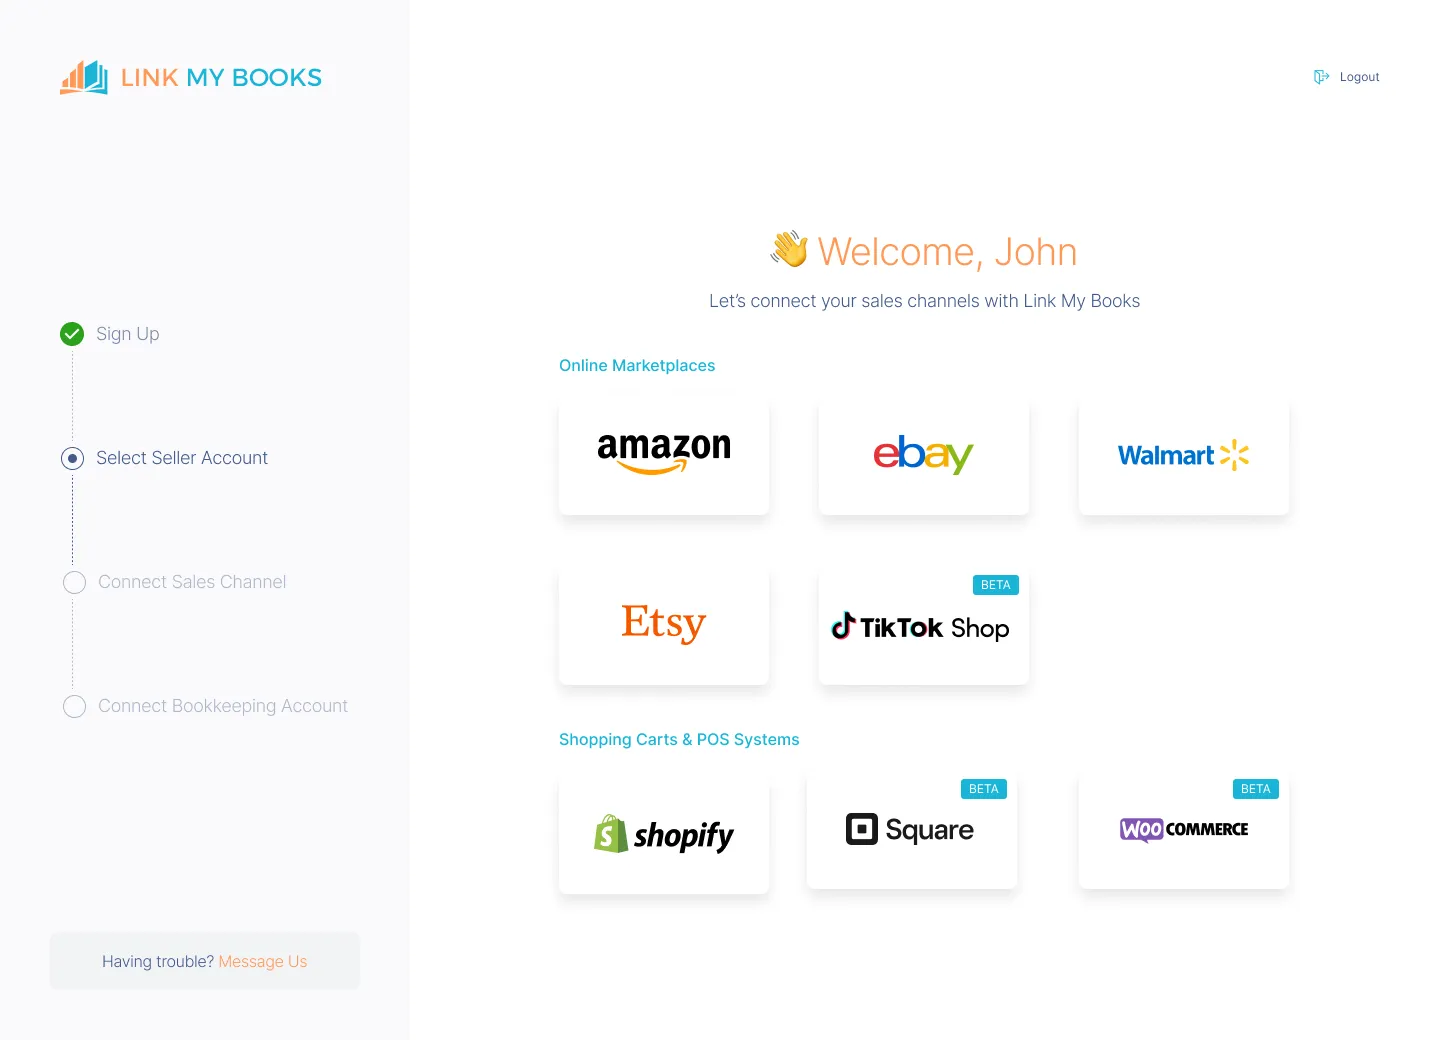
- Start a Free Trial of Link My Books.
- Log in with your QuickBooks Online account - this allows Link My Books to post summarized entries directly.
- Choose Shopify as your sales channel and authorize access.
- Link My Books will automatically import your recent payouts from Shopify, including all associated sales, refunds, discounts, and fees.
Each payout is converted into a summary entry (a sales invoice or journal, depending on your settings) that mirrors your actual bank deposit. Every line - sales, refunds, shipping, tax, and fees - is itemized and categorized for QuickBooks.
Step #3: Complete the Setup Wizard

Link My Books includes a guided setup wizard built for non-accountants. During setup, you’ll:
- Map income and expense categories in QuickBooks (e.g., Shopify Sales, Shopify Fees, Refunds).
- Assign VAT or sales tax codes per country (UK VAT, EU OSS, US Sales Tax).
- Enable COGS tracking to sync product costs if applicable.
- Activate multi-currency support if your Shopify store sells internationally.
This mapping only needs to be done once - Link My Books remembers your preferences and applies them automatically to every future payout.
Step #4: Sync Shopify Settlements to QuickBooks

You can:
- Send settlements manually for review before posting, or
- Enable AutoPost, which automatically sends new Shopify payouts to QuickBooks as soon as they’re available.
Each summary entry matches your bank feed exactly, so reconciliation in QuickBooks takes one click - select “Match” and you’re done.
Step #5: Enable Ongoing Automation
Once AutoPost is on, Link My Books will continue syncing new payouts automatically. You can adjust mappings anytime (for new SKUs, countries, or gateways) from your dashboard.
Optional features:
- Multi-store support (connect multiple Shopify stores to one QuickBooks account).
- Cross-channel consolidation (Shopify + Amazon + eBay + TikTok Shop).
- Profit & benchmarking dashboard for performance insights.
Why This Works Better Than Manual Syncs
Unlike the QuickBooks app, which pushes every order individually, Link My Books mirrors Shopify’s real payout structure. That means:
- One entry per payout (not hundreds).
- No duplicate or missing transactions.
- Automatic VAT/OSS mapping and COGS tracking.
- QuickBooks and your bank feed always align.
With Link My Books, your Shopify bookkeeping drops from hours per month to minutes - while staying fully compliant and audit-ready.

If you want to simplify your Shopify accounting, our 14-day trial is a great place to start!
Using Link My Books as a Reconciliation Tool for Shopify ⇆ QuickBooks Integration
Reconciliation is where most Shopify–QuickBooks integrations break down. Shopify deposits lump together dozens of transactions (sales, refunds, shipping, fees, taxes) while QuickBooks only sees a single number in your bank feed. If you try to match those manually, you end up chasing missing fees, duplicate income, or unaccounted VAT lines.
Link My Books fixes this at the source.
When you connect Shopify and QuickBooks through Link My Books, every Shopify payout is automatically summarized and posted into QuickBooks as a single journal or sales invoice. Each line inside that summary mirrors the actual composition of your payout:
After Link My Books posts the summary, QuickBooks automatically identifies the matching bank deposit in your feed. In most cases, you’ll see a green “Match” button next to the payout amount - one click and reconciliation is complete.

That’s the key difference from the official QuickBooks Connector app. Intuit’s app pushes each order individually, which means QuickBooks can’t recognize the deposit automatically. With Link My Books, you get clean one-to-one matches between Shopify payouts and QuickBooks deposits.
For accountants and multi-channel sellers, this also means monthly close takes minutes instead of days. Even complex setups with PayPal or Klarna will reconcile perfectly because Link My Books imports every gateway’s payout data separately and matches each to its bank feed line.

How to Integrate Shopify With QuickBooks Online Using the Intuit App

- Install the Intuit connector
- Authorize QuickBooks Online
- Connect your Shopify store
- Configure what syncs
- Map accounts and taxes
- Choose the history window and start syncing
- Reconcile in QuickBooks Online
Below is a clean walkthrough for the official Intuit connector. It works whether you start in QuickBooks Online or in the Shopify App Store.
Step 1: Install the Intuit connector
- From Shopify: Open the Shopify App Store and search QuickBooks. Choose QuickBooks Online Connector by Intuit and click Add app.
- From QuickBooks Online: Go to Apps in the left menu, search Shopify Connector by Intuit, then select Get app now.
Step 2: Authorize QuickBooks Online
- Sign in to QuickBooks Online and approve the connection so the app can post to your company file. You will be redirected to the Intuit Connector to finish setup.
Step 3: Connect your Shopify store
- In the Connector, choose Connect to Shopify, enter your store URL, and approve permissions when Shopify prompts you.
Step 4: Configure what syncs
In the Connector, choose how data should flow into QuickBooks Online:
- Sales and orders: Enable order sync so QuickBooks can create the sales documents it needs.
- Payouts: Turn on payout sync so deposits from Shopify are imported for easier income and expense visibility.
- Products and customers: Map product and customer creation or matching so duplicates are avoided.
- Inventory: If you track inventory in QuickBooks Online, enable item and quantity sync to keep counts aligned.
Step 5: Map accounts and taxes
- Assign default accounts in QuickBooks for sales, discounts, shipping, refunds, and fees.
- Review tax options and follow Intuit’s guide during setup to align with your tax settings before the first sync.
Step 6: Choose the history window and start syncing
- Select the date you want the connector to begin from, then start your first sync. The Connector will fetch data and begin creating entries in QuickBooks Online according to your settings.
Step 7: Reconcile in QuickBooks Online
- After payouts sync, open Banking in QuickBooks Online and match imported deposits to your bank feed. This confirms the integration is configured correctly.
Notes and practical tips
- Intuit’s connector brings orders and payouts from Shopify into QuickBooks Online, and can also sync products, customers, and inventory. Exact options depend on your region and app variant shown in the App Store.
- If you sell internationally or use multiple payment methods, review account and tax mappings carefully during setup to avoid misclassification. Intuit’s step-by-step help article walks you through each screen.
How to Manually Enter Shopify Data Into QuickBooks
- Export Your Shopify Payout Report
- Separate the Data
- Create a Journal Entry or Sales Receipt in QuickBooks
- Reconcile With Your Bank Feed
- Repeat for Every Payout
If you prefer to keep control of your books or you’re not ready to connect an automation tool yet, you can record Shopify sales manually in QuickBooks Online.
This method works, but it’s time-consuming, especially if you sell across multiple gateways like Shopify Payments, PayPal, or Klarna.
Here’s how to do it step by step:
Step 1: Export Your Shopify Payout Report
- In your Shopify admin, go to Settings → Payments → View Payouts.
- Select a payout, then click Export to download it as a CSV file.
- You’ll see all transactions that make up the payout - including sales, refunds, discounts, shipping, fees, and taxes.
Step 2: Separate the Data
- Sales: Total all sales and shipping collected before deductions.
- Refunds: List separately so they can be deducted from income.
- Fees: Include all payment processor and Shopify fees.
- Taxes: Identify VAT or sales tax collected.
Tip: If you use multiple gateways, export and separate reports for each provider (Shopify Payments, PayPal, Klarna). Each will send deposits independently.
Step 3: Create a Journal Entry or Sales Receipt in QuickBooks
- In QuickBooks Online, go to + New → Journal Entry (or Sales Receipt if you prefer to record gross sales).
- Record your total Shopify sales on the credit side using your income account (e.g., “Shopify Sales”).
- Add separate debit lines for refunds, discounts, and fees using their respective accounts.
- Add a tax liability line for VAT or sales tax collected, if applicable.
- The total of the journal entry should match your net Shopify payout.
Step 4: Reconcile With Your Bank Feed
- Once the payout appears in your QuickBooks bank feed, open the Banking tab.
- Match the deposit amount to your manual journal entry or sales receipt.
- Click Match to reconcile.
If you receive multiple payouts from different gateways, you’ll need to repeat this process for each one.
Step 5: Repeat for Every Payout
Each new Shopify payout must be entered manually following the same process.
For sellers processing more than a few orders per day, this method quickly becomes unsustainable. Even one missed fee or refund can throw your books out of balance.
That’s why most accountants recommend automating this process with a tool like Link My Books, which imports these same figures automatically - summarized, categorized, and reconciled in one click.
How Link My Books Makes Integrating Shopify With QuickBooks Automatic & Easy

Manual bookkeeping turns every Shopify payout into a project - sorting sales, refunds, taxes, and fees line by line before entering them into QuickBooks. Link My Books integration automates all of that, working as a smart layer between Shopify and your accounting software.
Once connected, it takes every payout from Shopify and converts it into a clean summary entry that matches your actual bank deposit. Here’s how it keeps your Shopify–QuickBooks integration running smoothly and accurately:
Automatic Categorization

Every transaction is analyzed and automatically assigned to the correct income or expense category in QuickBooks - sales, refunds, discounts, fees, or shipping.
No manual mapping or data entry. You’ll always know exactly where every penny goes.
Summary Invoices That Match Your Payouts

Instead of syncing every single order, Link My Books posts one summary invoice or journal entry per payout.
Each entry reflects the true breakdown of your Shopify deposit — gross sales, refunds, fees, shipping, and taxes.
That single summary aligns perfectly with your bank feed, allowing one-click reconciliation.
Accurate VAT and Sales Tax Mapping

Link My Books automatically applies the correct VAT, OSS, or sales tax rate for each sale based on the buyer’s location and marketplace tax rules.
This ensures compliance with UK VAT, EU OSS, and US marketplace facilitator regulations.
Multi-Marketplace and Multi-Currency Support

If you sell beyond Shopify - for example, on Amazon, eBay, or TikTok Shop - Link My Books consolidates all platforms into one unified QuickBooks view.
It also handles multiple currencies automatically, using accurate exchange rates pulled from Shopify and QuickBooks.
COGS Tracking for Real Profitability

Link My Books supports Cost of Goods Sold (COGS) tracking in QuickBooks, letting you see real profit margins rather than just gross revenue.
When your product cost data is set up in QuickBooks, the integration automatically posts it alongside your income, giving you accurate P&L reporting.
One-Click Reconciliation
Every Shopify payout imported via Link My Books matches your QuickBooks bank deposit exactly.
No adjustments. No guesswork. Just open your Banking tab in QuickBooks, hit Match, and reconciliation is done.

Want to simplify your Shopify bookkeeping ▶️check out our free trial!
Shopify–QuickBooks Integration: Regional, Local & Tax Considerations
Getting Shopify and QuickBooks to sync correctly means staying compliant with tax rules in every market you sell to. Each region handles taxes differently, and if those rates aren’t mapped properly, you risk overpaying or underreporting.
Link My Books takes these local tax variations into account automatically, applying the right tax treatment for each sale, refund, or fee.
UK and EU Sellers: VAT and OSS Compliance
If you sell within the UK or the EU, Shopify often collects and remits VAT under Marketplace Facilitator and One-Stop-Shop (OSS) rules.
Link My Books identifies which transactions are handled by Shopify and which you remain responsible for, separating them clearly in QuickBooks.
- UK VAT: Standard 20% VAT is applied to domestic sales, while exports outside the UK are zero-rated.
- EU OSS: When selling cross-border to EU customers, Link My Books automatically assigns the correct country-specific VAT rate and posts it to the appropriate liability account.
- Marketplace-collected tax: Shopify-collected VAT is excluded from your liability to prevent double reporting.
U.S. Sellers: Marketplace Facilitator Rules
In the United States, sales tax is governed at the state level. Shopify automatically collects and remits tax in most states under Marketplace Facilitator laws, meaning you don’t have to report those taxes again in QuickBooks.
Link My Books recognizes this and categorizes those transactions as tax-handled, ensuring your reports stay accurate.
For states where Shopify doesn’t remit tax, Link My Books records it in the correct liability account, so your return totals are complete.
Multi-Currency and Global Sellers
If your Shopify store sells in multiple currencies, payouts are deposited in your store’s primary currency, which may differ from your customer’s payment currency.
Link My Books automatically records the exchange rate used in each payout and posts accurate conversions into QuickBooks, ensuring your profit reports remain consistent across currencies.
Local Accounting Standards
QuickBooks users in the UK, EU, and Australia must often report under accrual accounting with detailed VAT reporting.
Because Link My Books summarizes payouts by payment date (cash basis) but preserves full detail per order, it remains compliant for both cash and accrual filers.
The Benefit of Automating Regional Rules
Without automation, managing tax across multiple regions means checking Shopify tax reports manually, splitting transactions, and remapping VAT codes in QuickBooks, a process that can take hours each month.
Link My Books eliminates this by automatically applying the correct tax logic, so your returns, VAT reports, and OSS submissions are always accurate and ready for filing.
Post-Integration Best Practices
Once your Shopify–QuickBooks integration is live, a few small habits will keep your books accurate and your reporting clean. Whether you’re using Link My Books or the native Intuit connector, these best practices ensure your data stays aligned month after month.
1. Review Your Sync Reports Regularly
Log in to your Link My Books dashboard or QuickBooks App Center to confirm each Shopify payout has been imported and posted correctly.
If a payout shows as “pending,” check your payment gateway connections - small interruptions in authorization can cause delays.
2. Reconcile Each Payout With Your Bank Feed
After each Shopify payout hits your bank account, open the Banking tab in QuickBooks.
If you’re using Link My Books, you should see a perfect one-to-one match between the bank deposit and the summary entry.
Click Match - reconciliation done.
3. Keep VAT and Tax Mappings Up to Date
When you add new products, sell into new regions, or cross VAT thresholds, review your tax mappings in Link My Books and QuickBooks.
Tax rates change periodically, especially in the EU and US states, so an annual audit keeps you compliant.
4. Lock Your Books Monthly
Once payouts are reconciled, use QuickBooks’ “Close the Books” feature at the end of each month.
This prevents accidental changes and maintains data integrity for reporting and VAT returns.
5. Coordinate With Your Accountant
Invite your accountant or bookkeeper to your Link My Books account.
They can review mappings, confirm VAT codes, and handle year-end adjustments directly from within the platform, eliminating back-and-forth emails.
6. Check for Multi-Channel Accuracy
If you connect more than one platform (Shopify, Amazon, eBay, TikTok Shop), verify that all channels sync to the same QuickBooks company file.
This keeps your consolidated financials accurate and avoids duplicate income reporting.
Following these post-integration steps ensures your Shopify–QuickBooks connection stays error-free, your tax filings are accurate, and your accountant has everything ready when it’s time to close the books.
FAQ on Shopify and QuickBooks Integrations & Connections
Can Shopify integrate with QuickBooks?
Yes. You can connect Shopify directly to QuickBooks Online using the official QuickBooks Online Connector by Intuit or automate the process with Link My Books. Both pull your Shopify sales into QuickBooks, but only Link My Books summarizes payouts to match your bank deposits perfectly.
How do I reconcile Shopify in QuickBooks?
If you’re doing it manually, export your Shopify payout report, create journal entries for sales, refunds, and fees, then match them to your bank feed.
If you use automation, Link My Books does this automatically by importing each payout as a summarized journal that matches your bank statement in one click.
You can read more about this process in our guide on how to reconcile Shopify payments in QuickBooks.
What is the best QuickBooks Shopify connector?
For small stores with simple setups, the official QuickBooks app can work. For sellers managing multiple gateways, currencies, or regions, Link My Books is the best Shopify–QuickBooks connector because it automates VAT mapping, multi-channel data, and reconciliation.
How often does data sync between Shopify and QuickBooks?
The Intuit app syncs daily or hourly, depending on settings. Link My Books automatically imports every new payout as soon as Shopify releases it, keeping your data continuously updated.
Can you sync orders, inventory, and customer data between Shopify and QuickBooks?
Yes, both tools can sync product and customer information. However, Link My Books focuses on accurate accounting rather than inventory management. For full bookkeeping automation, it integrates with your Shopify payouts, ensuring your Shopify bookkeeping stays accurate and up to date.
Can I use QuickBooks without an integration tool?
You can, but it means manually exporting reports and entering every sale, refund, and fee yourself. This approach works for low-volume sellers, but for anyone managing multiple payouts per month, automation through Link My Books or similar tools is essential to maintain accuracy and save time.
What’s the best app for Shopify sellers?
If your main goal is simple Shopify financial integration and easy VAT compliance, the best option is Link My Books. It connects Shopify, QuickBooks, and other platforms like eBay or Amazon in one place, helping you automate your accounting and avoid overpaying your VAT.
If you’d like to explore your options, read our guide to the best Shopify accounting software.
How do I handle returns when connecting QuickBooks and Shopify?
Shopify records returns as negative transactions or refunds. Link My Books captures those automatically and posts them to your refund account in QuickBooks, keeping your Shopify transaction report balanced and compliant.
How does automated tax data syncing simplify sales tax management?
Automation prevents errors caused by double-reporting or missed VAT liabilities. Link My Books applies the correct VAT, OSS, or sales tax automatically and separates marketplace-collected tax from your liability. You can read more about this in our Shopify VAT guide.
Do I need a separate app for COGS tracking?
No. Link My Books supports COGS Shopify tracking directly within QuickBooks. Once you’ve mapped your expense accounts, the integration automatically assigns costs to each sale, giving you real profitability insights.
Can I connect multiple Shopify stores to QuickBooks
Yes. Link My Books allows multi-store connections under one QuickBooks account, making it easy to consolidate your financial data if you manage multiple brands or regions.
Shopify Business Integration With QuickBooks – Automate With Link My Books

Manual Shopify bookkeeping eats into valuable time you could spend growing your store. Between sales, refunds, VAT, and payment fees, keeping QuickBooks aligned can take hours every week - and even small mistakes can throw your reports off.
Link My Books turns that entire process into a hands-off workflow. It automatically imports your Shopify payouts, separates fees, refunds, and taxes, applies the correct VAT or OSS rules, and posts everything into QuickBooks as clean, ready-to-reconcile entries.
The result:
- Accurate books that match your bank deposits perfectly
- Automatic VAT and OSS compliance
- Real-time insight into your true profit margins
- Full support for multiple stores and currencies
Whether you’re a small Shopify seller or a growing e-commerce brand, Link My Books helps you keep your accounting effortless, accurate, and compliant - every single month.

👉 Start your free 14-day trial of Link My Books and simplify your Shopify–QuickBooks integration today.


![How to Integrate Shopify with QuickBooks Online in 10 Minutes [2026]](https://cdn.prod.website-files.com/60af32ce0a63dc4f22cc85a1/68f7eb2018d09b43f5bd0178_shopify%20quickbooks%20integration.webp)



.webp)


.png)