

.webp)
Keeping track of Shopify sales in QuickBooks can quickly turn into a headache, especially if you’re doing everything manually. The more sales you make, the harder it is to stay on top of things, and all those little details can easily slip through the cracks, leading to frustration when tax season rolls around.
But, there's an easier way. Whether you’re setting this up for the first time or looking to clean up your current system, this guide will walk you through some simple steps to make your life easier and keep your books accurate.
Key Takeaways from this Post
Before you sync Shopify with QuickBooks, it’s a good idea to audit and reconcile your past data. Cleaning things up ahead of time means you won’t be importing messy data into QuickBooks, and it sets you up for smoother automation going forward.
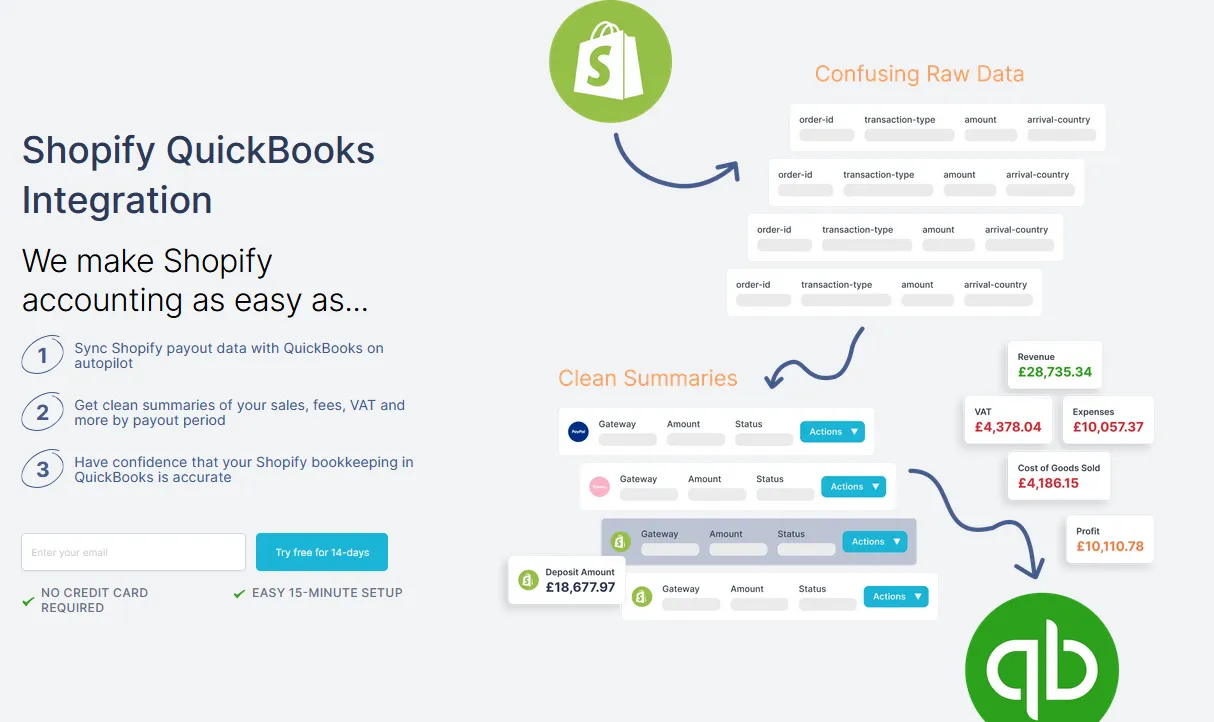
Manually entering data is not only a huge time-suck but also prone to mistakes. Link My Books automates the whole process, saving you hours and ensuring your sales and fees are accurately recorded in QuickBooks. Plus, you’ll get real-time financial insights, so you’re always in the loop without all the tedious work.
The best way to keep Shopify and QuickBooks in sync is by connecting your accounts, setting up proper synchronization, and regularly checking for updates. With Link My Books, everything works together smoothly, and your financials stay on track without constant manual adjustments.


Most Shopify-QuickBooks Integrations Fail Without Proper Account Mapping
When it comes to integrating Shopify with QuickBooks, most people think just connecting the platforms is enough to stay on top of their finances.
But here’s where many go wrong: without accurately mapping your accounts and categorizing each type of transaction, you end up with mismatched data, reporting errors, and hours spent manually correcting entries.
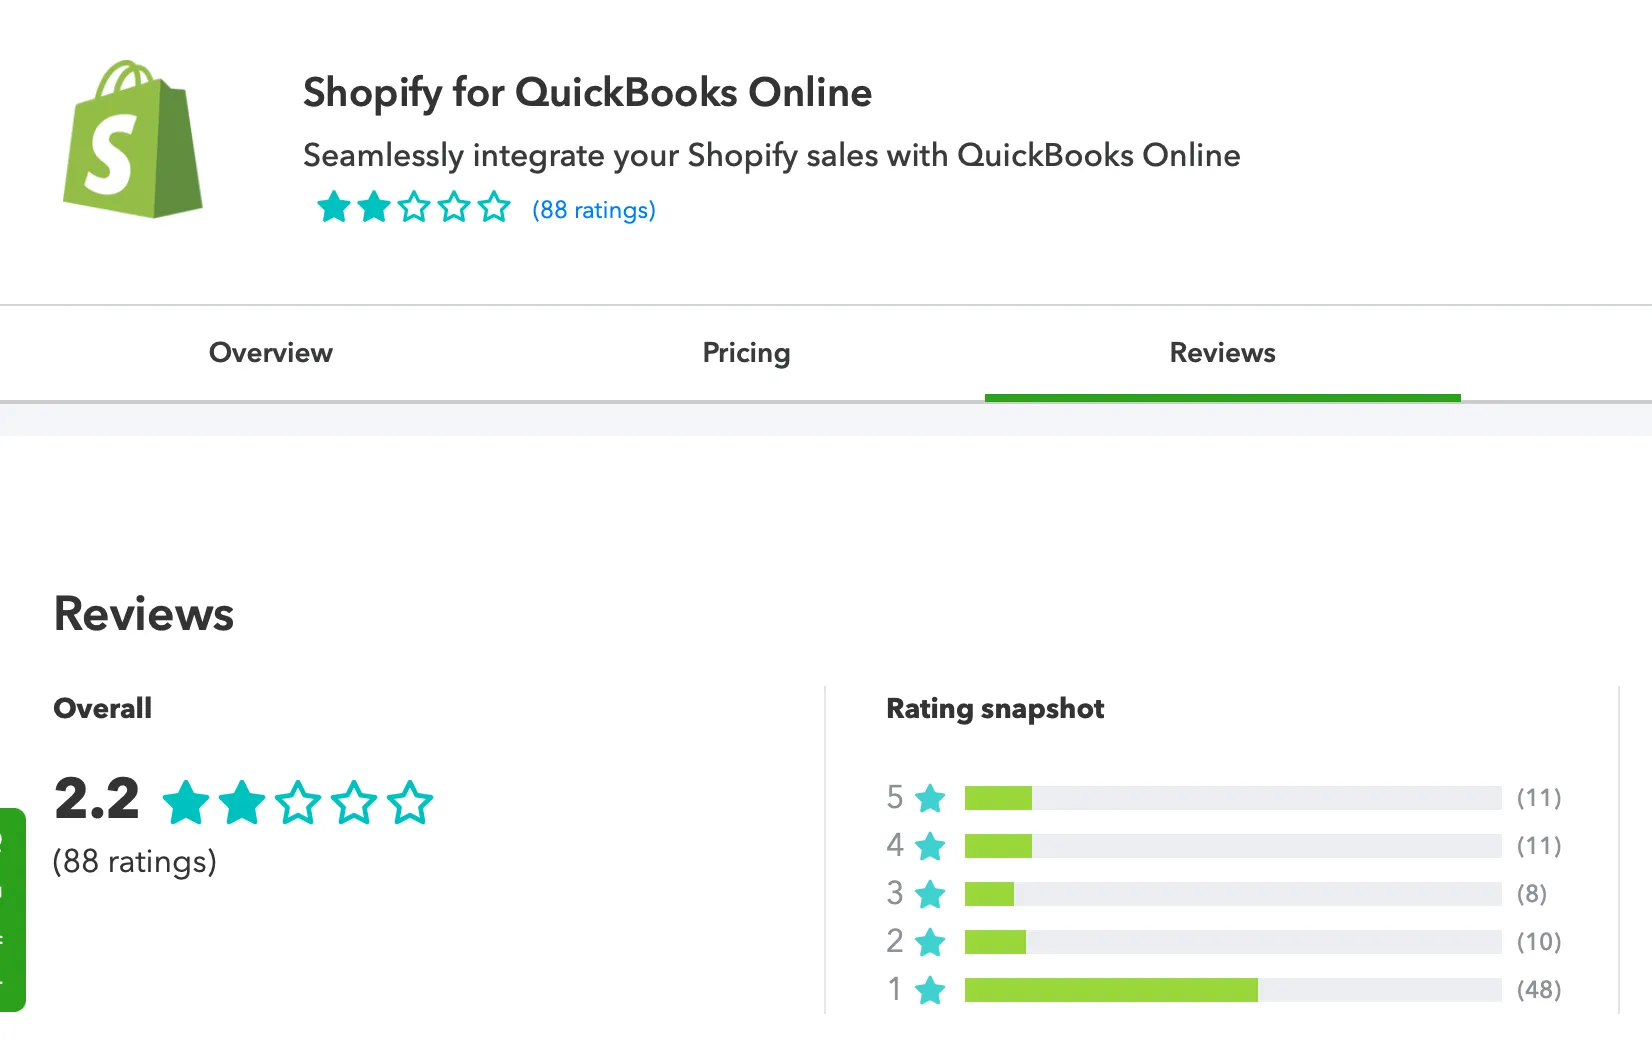
Although QuickBooks offers a direct integration with Shopify, the users are reporting it to be unreliable, some even experienced data loss during transfers. Plus, it doesn’t map products and inventory accurately within QuickBooks.
Link My Books automatically maps all your Shopify sales, fees, and taxes to the right QuickBooks accounts. This prevents errors and keeps your books accurate without any manual work. Unlike basic syncing tools, Link My Books gives you precise financial data to track your business performance.

And you only need a few steps to set it up.
How to Record Shopify Sales in QuickBooks
- Start a free trial of Link My Books
- Connect your Shopify and QuickBooks accounts
- Setup using a quick and easy guided setup wizard
- Choose automatic sync or manual sync
- Reconcile payouts from Shopify with LMB sales entries in one click
Step #1: Start a free trial of Link My Books
Get started by heading over to the Shopify App Store, downloading Link My Books, and installing the app.
You have a 14-day trial period so you can see the true impact of automation.
This trial lets you experience the full functionality of Link My Books, allowing you to see how it simplifies the process of recording Shopify sales in QuickBooks. During the trial, you can connect your Shopify store and explore how automated syncing works.
Step #2: Connect your Shopify and QuickBooks accounts
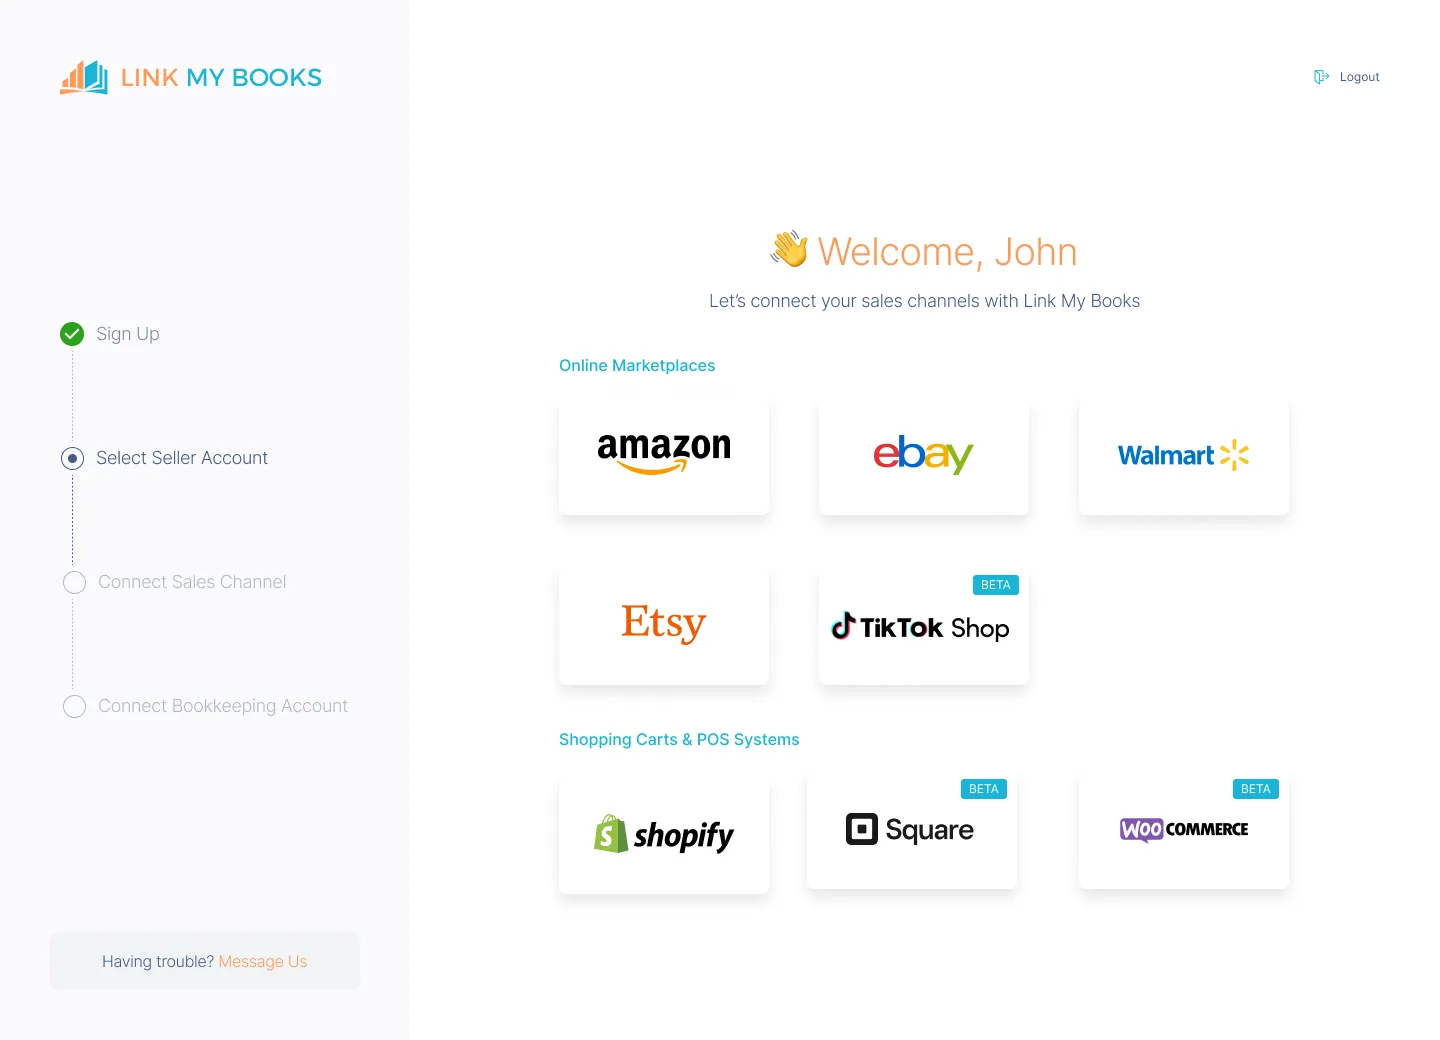
Once signed in, Link My Books will prompt you to connect your accounts. Select Shopify and QuickBooks from the options, then follow the easy prompts to authorize both platforms.
With these two connected, Link My Books can automatically pull your Shopify sales data and prepare it for entry into QuickBooks. This ensures every sale, fee, and tax amount is imported accurately and mapped to the correct accounts.
Step #3: Setup using a quick and easy guided setup wizard
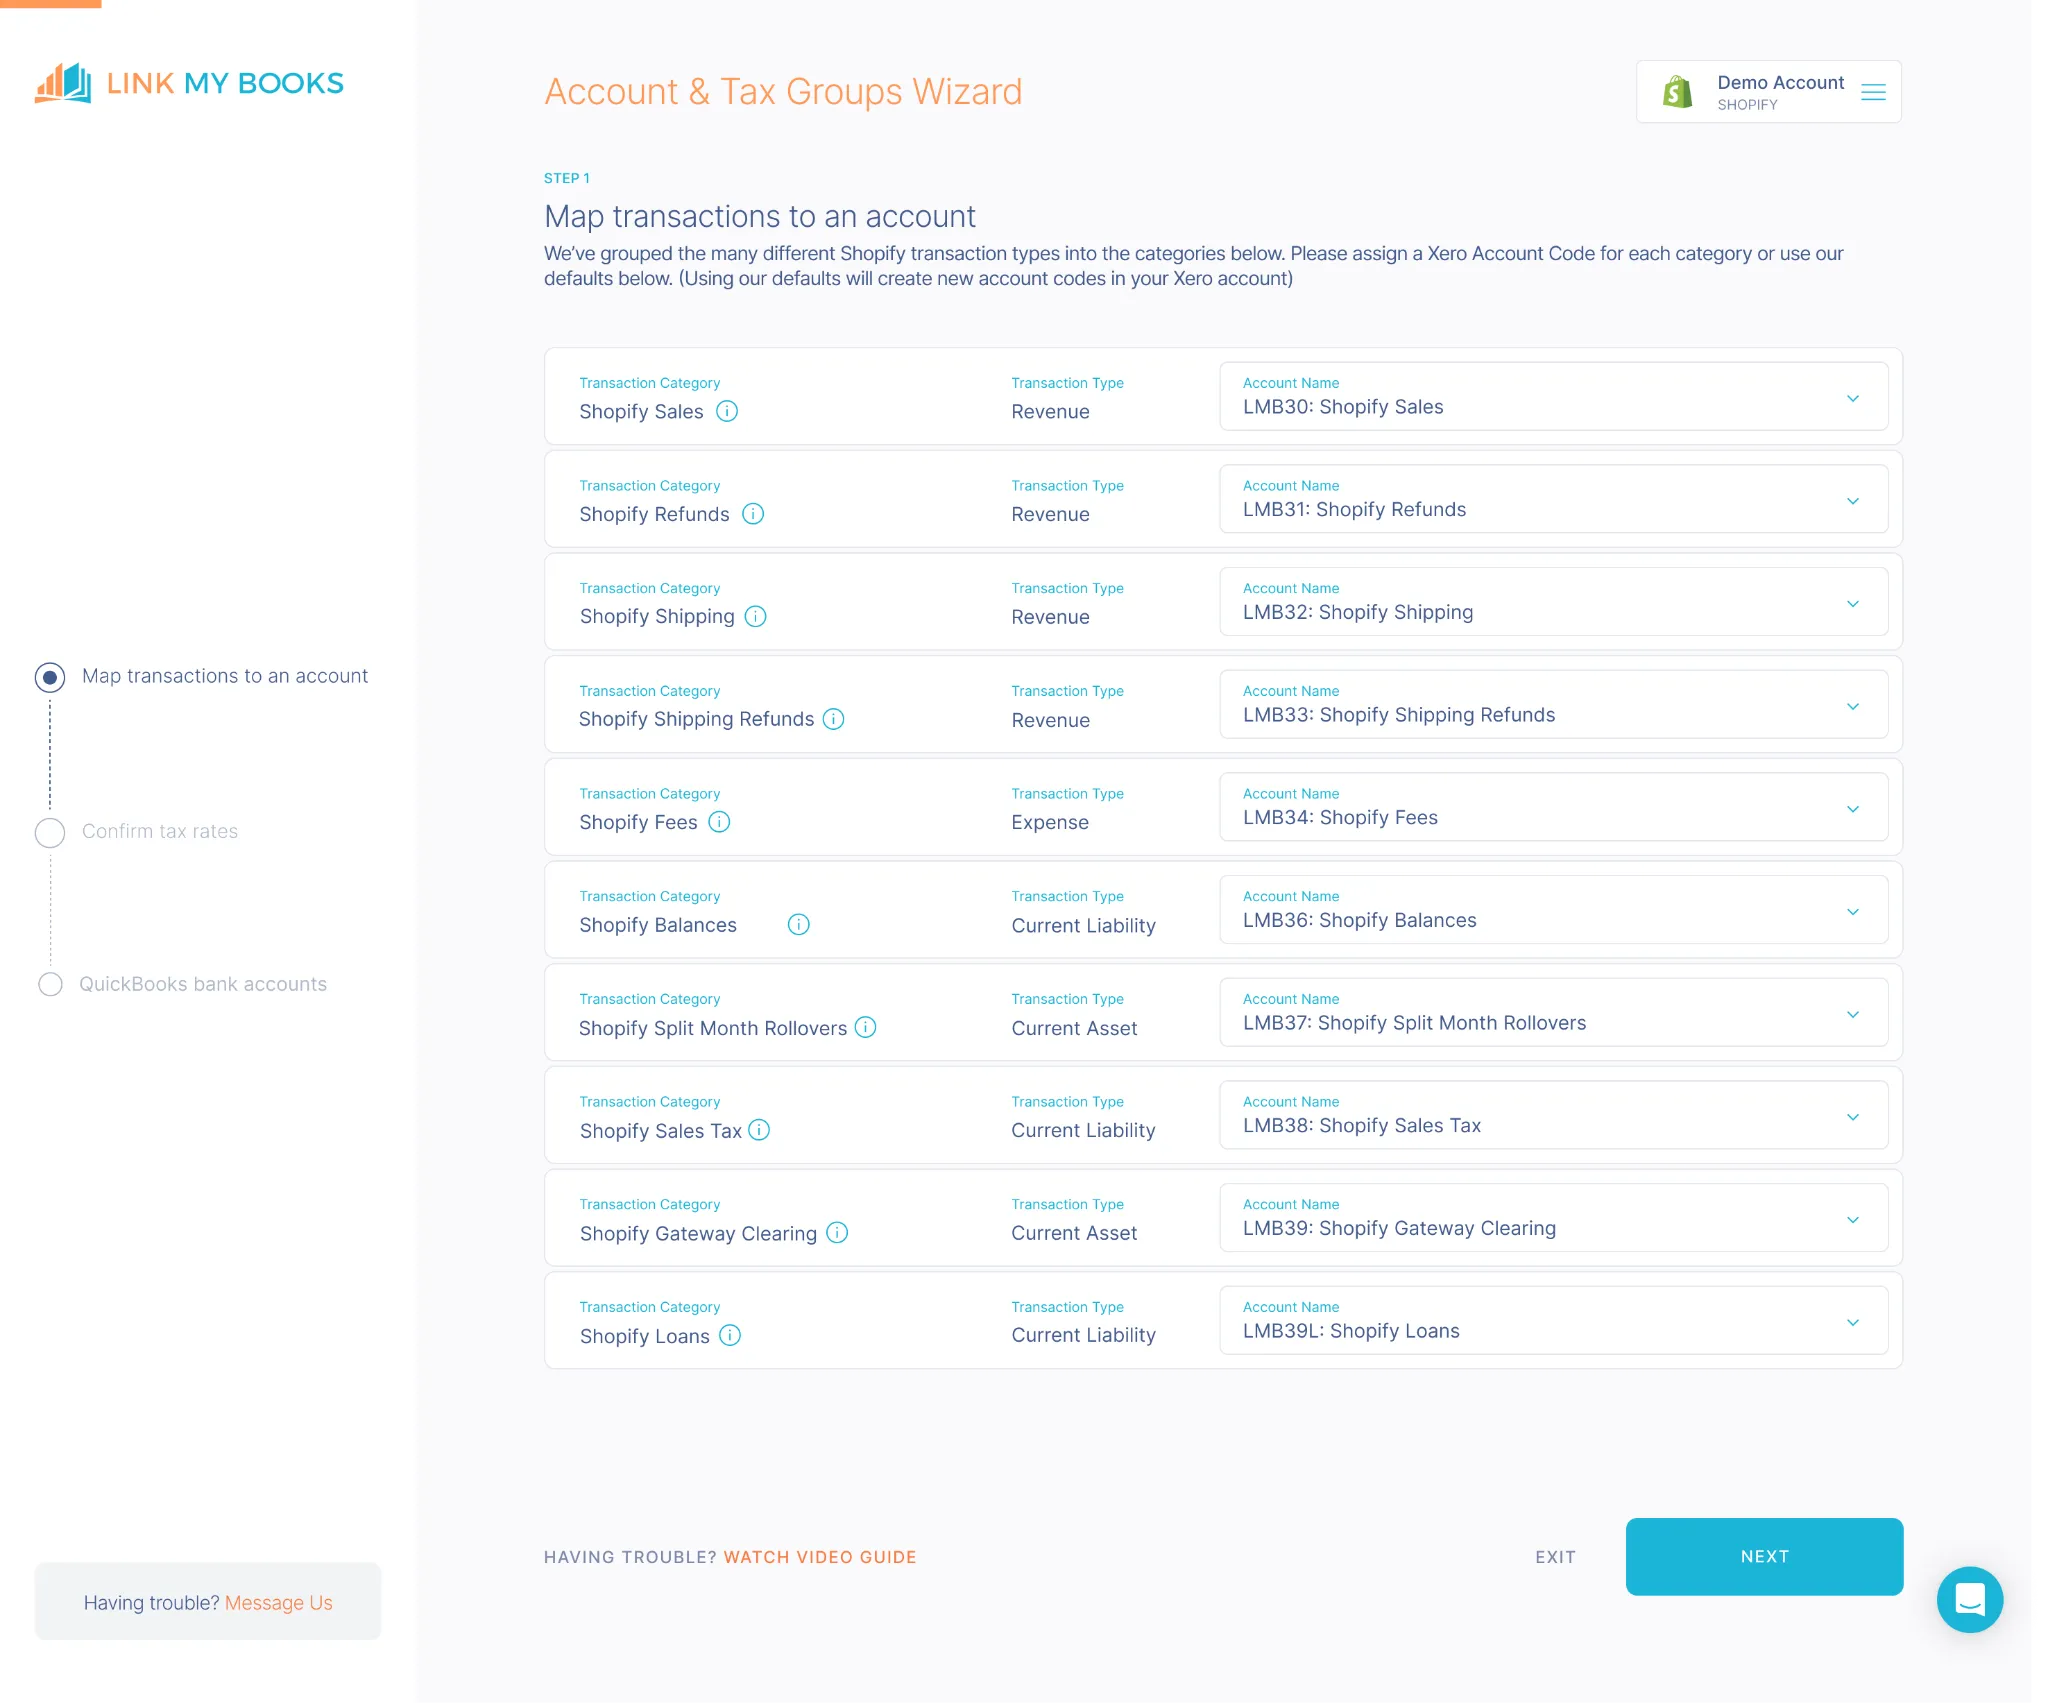
Next, the Setup Wizard will guide you through the initial configuration.
You’ll be prompted to map each type of Shopify transaction, like sales revenue, discounts, fees, and taxes, to the right accounts in QuickBooks.
This setup step is important because it determines how your Shopify data is categorized in QuickBooks, keeping your accounts organized and compliant with tax regulations.
Link My Books simplifies this by suggesting default categories, but you can customize it to match your specific needs.
Step #4: Choose automatic sync or manual sync
With Link My Books, you have the flexibility to select either automatic sync or manual sync:
- Automatic Sync: This option automatically posts sales summaries to QuickBooks. It’s ideal if you want a hands-off approach where Link My Books continuously keeps your QuickBooks account updated with the latest Shopify data.
- Manual Sync: If you prefer more control, you can choose to manually approve each sales summary before it’s posted. This is great if you’d like to review or double-check entries before they hit your books.
Step #5: Reconcile payouts from Shopify with LMB sales entries in one click

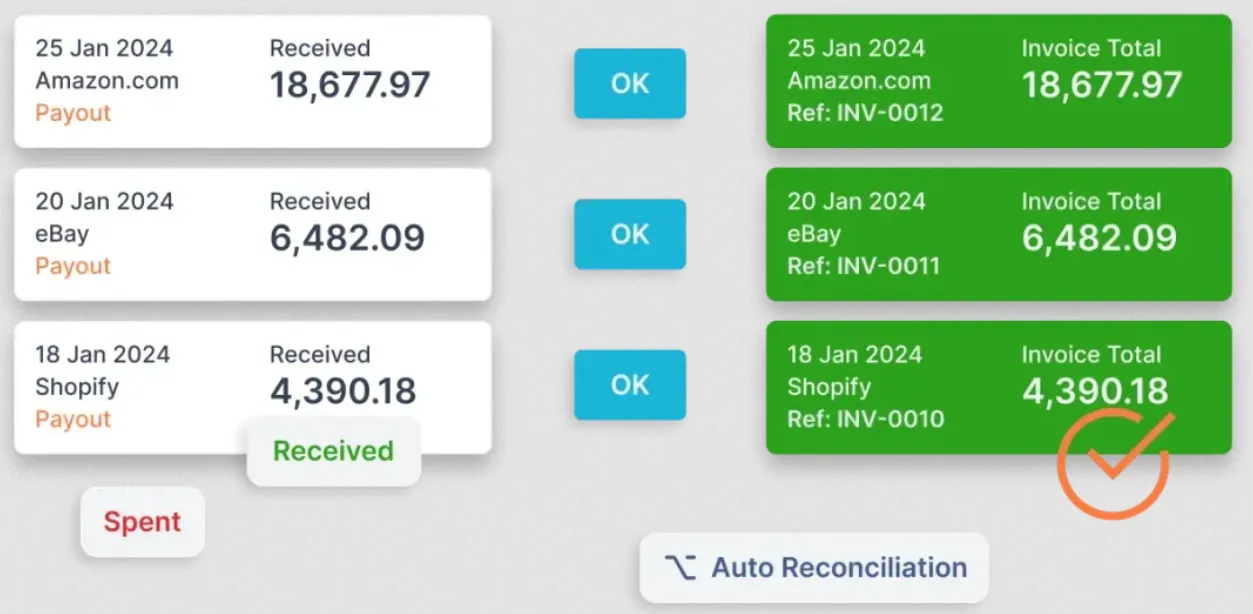
With Link My Books, reconciling your Shopify payouts is incredibly simple. Each payout from Shopify is summarized and matched with corresponding entries in QuickBooks, allowing you to reconcile in a single click.
This not only saves time but ensures that all Shopify transactions- sales, fees, taxes, align perfectly with your bank deposits in QuickBooks, eliminating any manual adjustments or complex reconciliation work.
How Link My Books makes recording Shopify Sales in QuickBooks automatic & easy
Managing Shopify sales in QuickBooks can quickly become a chore, especially if you’re handling each transaction manually. That’s where Link My Books steps in to streamline and simplify the process, taking the guesswork out of e-commerce accounting.
Here’s how Link My Books makes Shopify-to-QuickBooks integration automatic and effortless:
1. Automated Sales Reconciliation
With Link My Books, your Shopify sales data is automatically imported into QuickBooks, where each transaction is accurately categorized. This eliminates the need for manual entry and ensures your books are consistently up-to-date, making monthly reconciliations smooth and effortless.
2. Accurate Tax Calculations
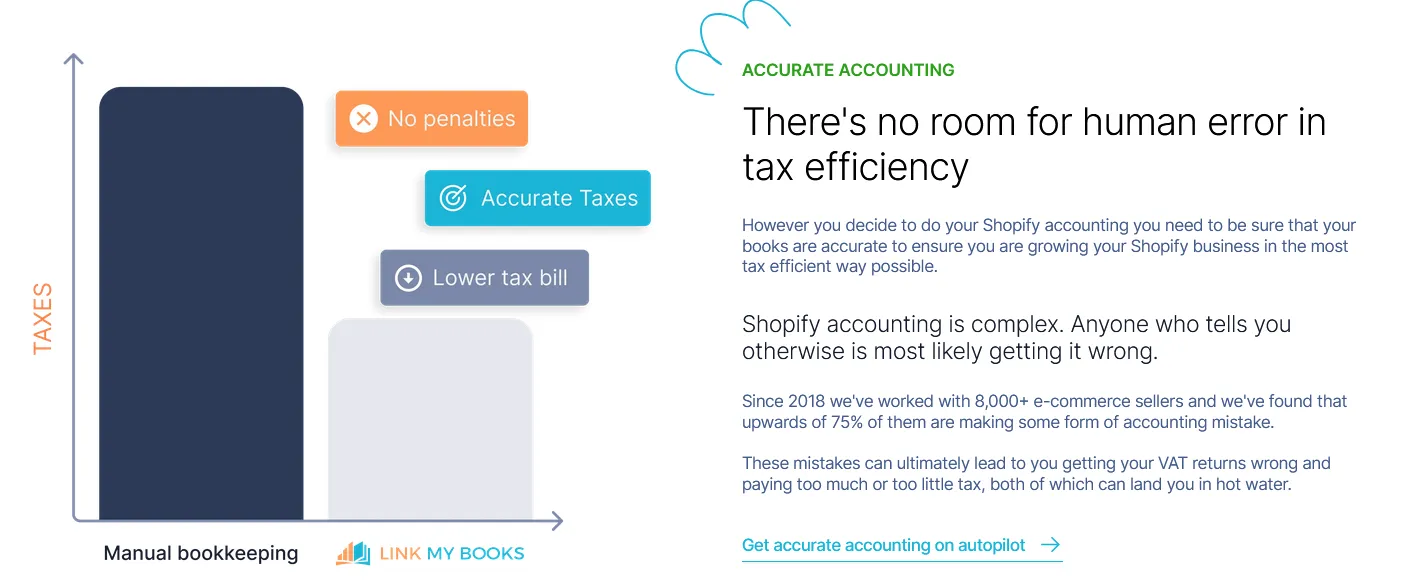
Tax compliance is made easy with Link My Books, as it calculates sales tax for you based on real-time data from Shopify. Whether you’re managing Shopify VAT or regional sales tax, Link My Books ensures accuracy with each transaction, so you’ll never have to worry about misreporting or paying penalties.
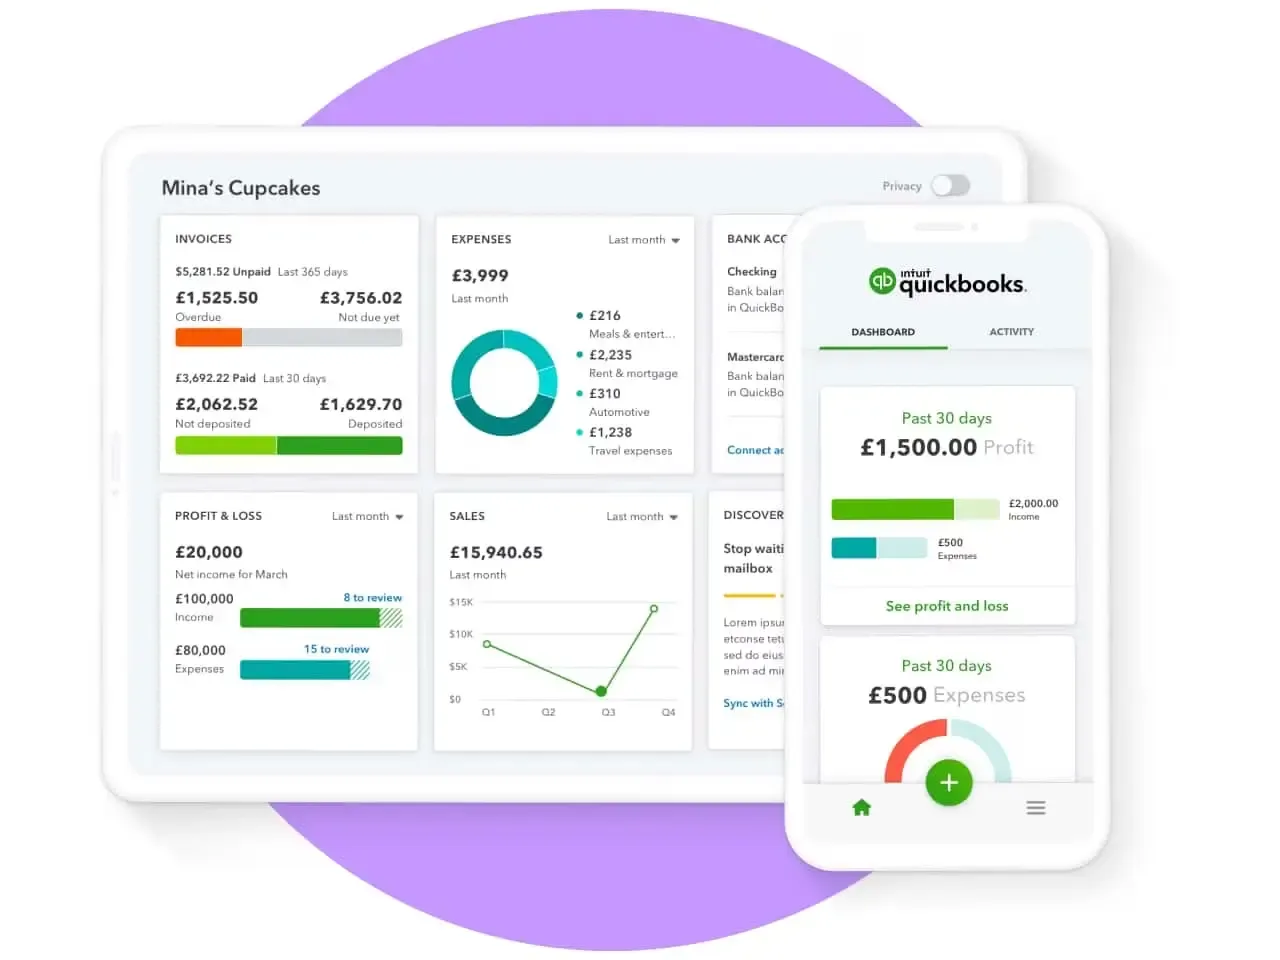
3. Comprehensive Financial Reporting
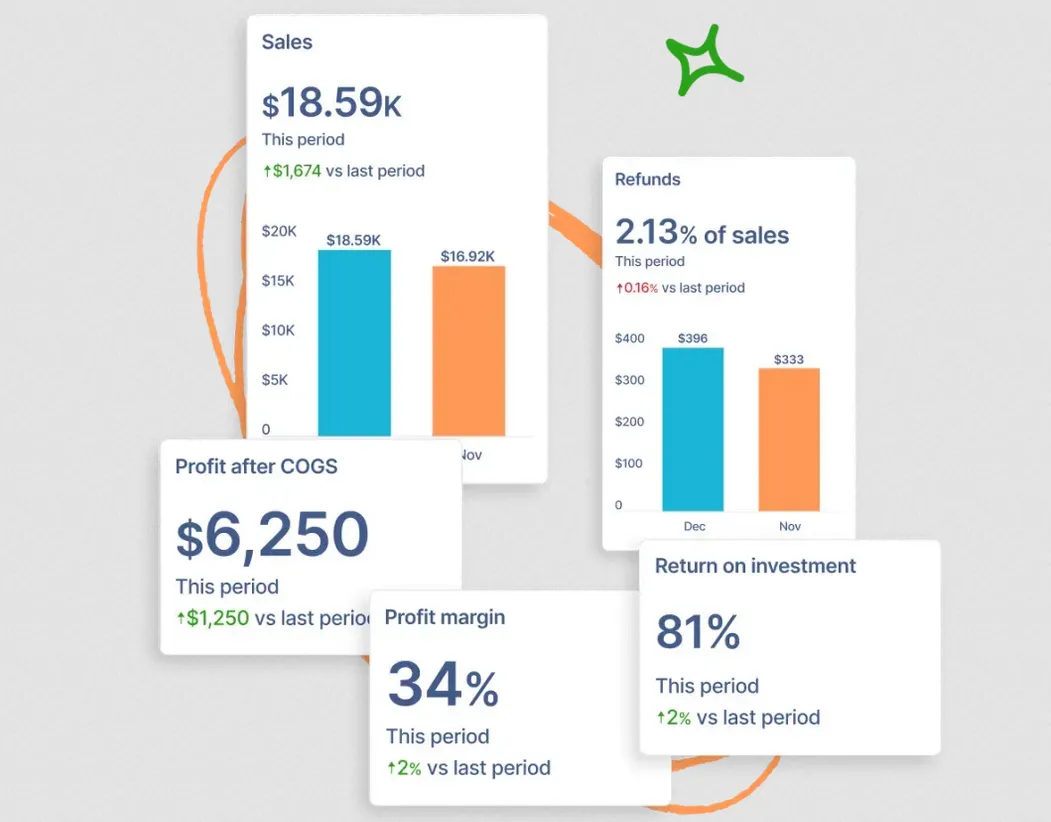
Link My Books provides detailed, easy-to-read reports that show everything from profitability to tax liabilities. Built with Shopify sellers in mind, these reports help you see exactly how your business is performing, offering insights that are essential for planning and growth.
4. Cost of Goods Tracking
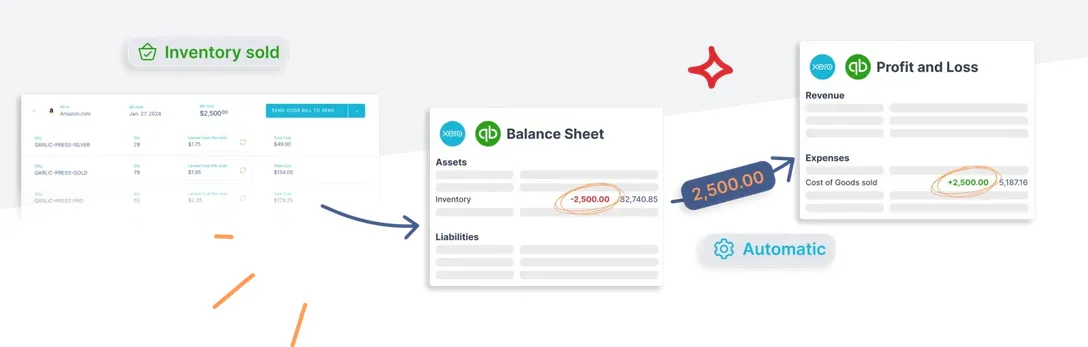
Stay on top of your profit margins by tracking your Cost of Goods Sold (COGS) directly through Link My Books. This feature helps you understand the true profitability of each sale and keeps your financial reporting accurate, giving you a clear view of both costs and revenue.
5. Benchmarking
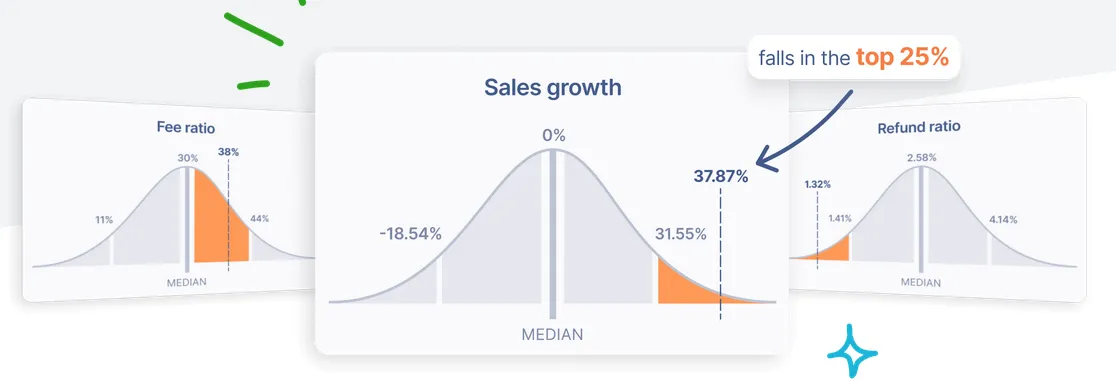
Link My Books offers a unique benchmarking feature, allowing you to compare your store’s performance against anonymized data from similar businesses. This comparison gives you a real sense of how you’re doing in the market, helping you identify areas for improvement or growth opportunities.
With Link My Books, recording Shopify sales in QuickBooks becomes an automatic, hassle-free process, giving you accurate data and deep insights without the manual work.
Why manually recording Shopify sales in QuickBooks is problematic

Manually entering Shopify sales data into QuickBooks leads to a host of issues that can be mitigated through proper integration:
Time-Consuming Process
Manually entering hundreds or thousands of orders from Shopify into QuickBooks is extremely labour intensive. An employee has to manually type in sales details like date, amount, products, customer, etc for each order. This repetitive manual work takes away time from more impactful tasks like customer service, product development, and marketing.
Shopify-QuickBooks integrations automatically and seamlessly transfer order details into QuickBooks in real time without any manual work. This saves countless hours of repetitive manual data entry.
Risk of Data Entry Errors
Humans make mistakes. Typos, incorrect dollar amounts, wrong account or tax classifications, mismatched dates, and other errors can easily occur when manually entering data. Even a minor error can undermine the accuracy of financial reports.
Automated integration eliminates the risk of human error in data entry. Order details flow directly from Shopify to QuickBooks without any manual typing. This improves the reliability of reports.
Delayed Insights on Performance
With manual processes, there is always a gap between an order occurring on Shopify and being recorded in QuickBooks. This significantly delays visibility into key performance metrics like sales volumes, profits, margins, etc.
Real-time syncing through integration provides immediate insights into sales and order activity. This enables quicker identification of issues or opportunities.
Inventory Level Inaccuracies
Stock levels get outdated in QuickBooks if order details are manually entered after a delay. This inaccuracy can lead to overselling inventory if stock is not deducted in real time.
Integration syncs order data and inventory deductions rapidly across both platforms. This prevents inventory mismanagement issues like stock-outs or overselling.
Audit and Compliance Issues
The lack of an audit trail for manually entered transactions increases tax errors and the chances of triggering IRS audits. Errors also arise when keeping data across systems consistent.
Proper integrations provide detailed audit trails and transaction histories, improving compliance. Data consistency across systems also increases through automation.
You can explore more about Best Shopify QuickBooks integrations here.
Key takeaways for entering Shopify sales in QuickBooks
- Avoid Manual Hassles: Manually recording Shopify sales in QuickBooks is tedious, error-prone, and leads to reporting and inventory inaccuracies. Automating with Link My Books solves these issues, ensuring your financial data stays accurate and current.
- Effortless Syncing: With automated syncing, Link My Books seamlessly imports your Shopify sales, fees, and taxes into QuickBooks, eliminating the need for repetitive data entry and saving you hours.
- Enhanced Reporting and Accuracy: Link My Books provides accurate, real-time reconciliation reports and insights, giving you a clear view of your sales performance, profitability, and tax liabilities.
- Inventory & Workflow Automation: Bi-directional syncing keeps your inventory updated and streamlines workflows, so every transaction is aligned across systems, reducing fulfillment errors and simplifying back-office tasks.
- Scalable Growth: With Link My Books, you build a solid foundation for growth. Automated integration between Shopify and QuickBooks means you can focus on high-value tasks, knowing your books are automatically updated and your business is optimized for future scaling.
Automating your Shopify-QuickBooks integration with Link My Books saves time, improves accuracy, and keeps your business ready for growth.
Record your Shopify sales in QuickBooks with Link My Books
Ready to streamline your e-commerce accounting? Say goodbye to the headache of manual data entry and hello to hassle-free financial management with Link My Books. This powerful tool effortlessly integrates your Shopify sales into QuickBooks, ensuring precision, saving time, and providing invaluable insights into your business performance. Don't let outdated methods hold you back. Embrace the future of e-commerce accounting software.
Try our 14-day free trial and feel the power of automated e-commerce bookkeeping for yourself!


%20(1).webp)


.png)