

You can’t grow what you can’t measure, and for Shopify sellers, the sales by product report is mission-critical. It tells you exactly what’s selling, how much, and what you’re making on each SKU.
The problem? Shopify’s native reporting shows product-level sales but doesn’t tie that data to payouts, VAT, or your accounting software. That means hours spent downloading reports, wrangling spreadsheets, and trying to explain mismatched numbers to your accountant.
This guide will show you exactly how to pull your Shopify product sales report, plus how to automate the entire process using Link My Books, so your sales, taxes, and books always match.
Key Takeaways from this Post
Shopify’s sales by product report gives basic product-level insights but lacks payout, tax, and fee reconciliation.
Manual reporting wastes time, introduces human error, and often leads to VAT overpayments.
Link My Books syncs Shopify sales, fees, and taxes directly into Xero or QuickBooks with full automation.


Where Most Shopify Sellers Go Wrong with Sales by Product Reports

Most sellers assume the Shopify sales by product report is enough. It’s not.
Yes, it shows quantity sold, gross sales, and discounts by SKU, but it doesn’t link those sales to actual payouts, fees, or VAT liabilities. That disconnect causes major issues when it’s time to reconcile your books.
Here’s what typically goes wrong:
- You export the report, but it doesn’t match your payouts: Payments from Shopify, Klarna, or PayPal don’t map cleanly to product sales, making reconciliation a manual nightmare.
- You can’t see tax breakdowns by product: If you sell to multiple regions, VAT or sales tax rates vary by location and product type. Shopify doesn’t split this out in a way that’s useful for accounting.
- You lose time cross-referencing reports and spreadsheets: Product sales, payment reports, and tax exports all reside in different places. And none of it connects directly to your accounting software.
That’s why sellers choose Link My Books.
Instead of manually wrangling reports, you can automate everything, sales by product, fees, shipping, VAT, and more, directly into Xero or QuickBooks, with zero spreadsheets required.
A Simpler Way to Handle Shopify Sales by Product Reports

If you’re tired of manual Shopify bookkeeping, Link My Books can cut your month-end process from hours to minutes.
- Your product sales, fees, refunds, and taxes sync automatically to Xero or QuickBooks
- All tax rates are mapped correctly, UK VAT, EU OSS, US sales tax, and more
- Shopify payouts are reconciled to your bank feed in a single click
- You get clean, audit-ready reports every time
How it works:
1. Connect Shopify to Xero or QuickBooks
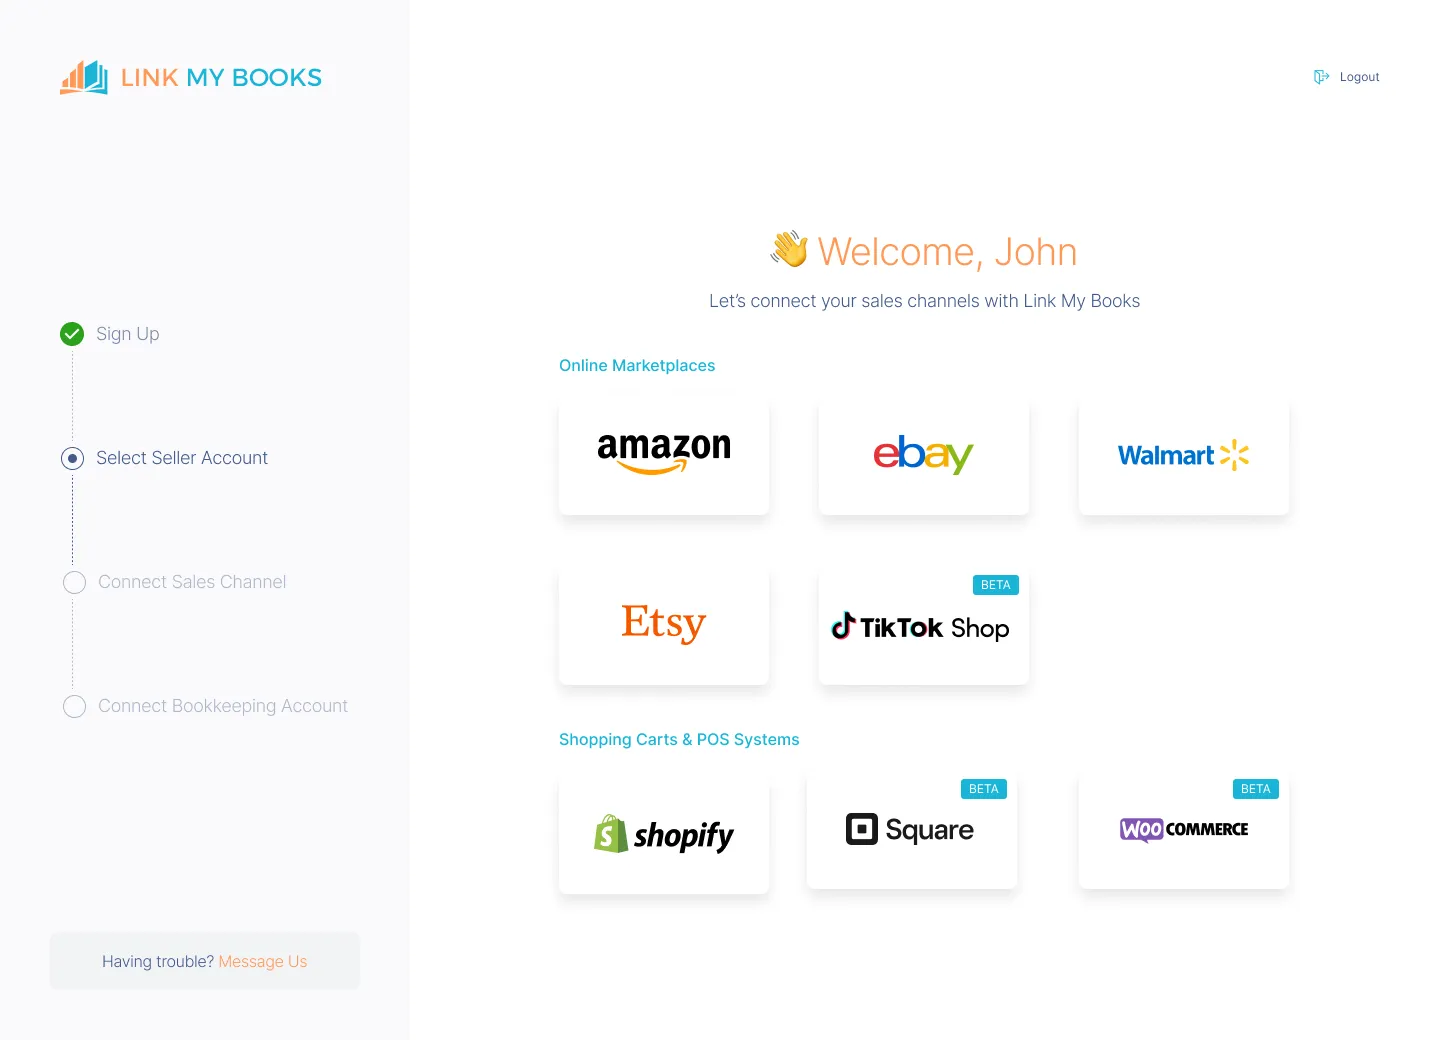
When you start your 14-day free trial and link your Shopify store, Link My Books begins pulling in sales, fees, and taxes automatically.
2. Use the Guided Setup Wizard

You’ll map your revenue, refunds, shipping, and tax categories. Link My Books suggests defaults based on your country and accounting setup.
3. Generate VAT-Ready Summaries

Each payout is broken down by product, showing exactly what was sold, how much VAT was collected, and what fees were deducted.
Here’s an example of how Link My Books breaks down a Shopify payout:
🧾 Invoice Summary:
- $1,200 product sales
- $40 shipping income
- $240 VAT
- $120 fees
- $80 refunds
- Net payout: $800 → perfectly matched to your bank feed
4. Reconcile Instantly

Link My Books posts a clean summary into your accounting software that matches your Shopify payout exactly. No guesswork. No spreadsheets.

If you’re tired of wasting time on manual reports or if your accountant keeps asking for better data, this is the fix.
You can try Link My Books for free!
If you still want to do it the manual way, here is how:
How to Get a Sales by Product Report on Shopify
- Go to your Shopify admin dashboard
- Find the Sales by product report
- Adjust the date range
- Customize
- Export the report
Step #1: Access Shopify Analytics and Reports
Start by logging in to your Shopify admin at shopify.com/admin.
From the main dashboard:
- Click “Analytics” in the left-hand navigation menu.
- Then select “Reports.”
This will open up Shopify’s built-in reporting hub, where you’ll find sales, finance, inventory, and customer reports, depending on your plan.
If you're not seeing this section, check your plan level. You’ll need to be on Shopify Basic or higher to access product-level sales reports.
Step #2: Find the “Sales by Product” Report
Once you’re in the Reports area:
- Scroll to the Sales section.
- Click on “Sales by product.”
This report displays:
- Product name
- Quantity sold
- Gross sales
- Discounts
- Returns
- Net sales
- Tax collected
Use this to analyze which products are performing best, track seasonal trends, or prep for VAT filings.
You can find the product-level view inside the Shopify sales report section of your Analytics dashboard.
Step #3: Set a Custom Date Range
By default, Shopify will show recent sales.
To get a better view of trends or prepare reports for accounting:
- Use the date filter in the top-right corner.
- Choose from presets (last 7 days, month to date, etc.) or select a custom range.
This is useful if you’re running monthly VAT reports or comparing Q1 vs Q2 performance.
Step #4: Customize Columns for Deeper Insight
Click “Edit columns” in the top-right of the table.
Here, you can add or remove columns like:
- Product vendor
- Product type
- Gross sales
- Taxes
- Shipping
- Returns
- Net quantity
Customize the view to match the data your bookkeeper or accountant needs, especially for tax and reconciliation purposes.
Step #5: Export the Report as CSV
Once the report looks how you want:
- Click the “Export” button at the top.
- Choose CSV for spreadsheet analysis.
You’ll now have a raw data file you can send to your accountant or attempt to reconcile manually, though it won’t break down fees, gateway payouts, or VAT groupings on its own.
Essential Shopify Transaction Report Figures to Know
Shopify’s sales by product report gives you a surface-level view, but to get your books right, you need to understand what’s really behind the numbers.
Here are the key figures every Shopify seller should track for clean financials and accurate tax reporting:
Tracking these figures manually is not only time-consuming, it’s risky.
If you’re submitting VAT returns or reconciling across gateways like PayPal, Klarna, or Shop Pay, even a small mismatch can cause headaches later.
Link My Books automatically captures and categorizes all of the above, splitting out every transaction for product sales, fees, refunds, and taxes, then syncing it straight to your accounting software.
How to Use Shopify Sales by Product Report Figures for VAT Calculation
If you're VAT-registered, your Shopify sales by product report isn't just a performance tracker; it’s the foundation of your VAT return.
But Shopify doesn’t show which products were taxed at which rate. And with mixed-rate products (standard, reduced, zero), it's easy to overpay or misreport VAT.
Here’s how to use your product-level data to stay compliant:
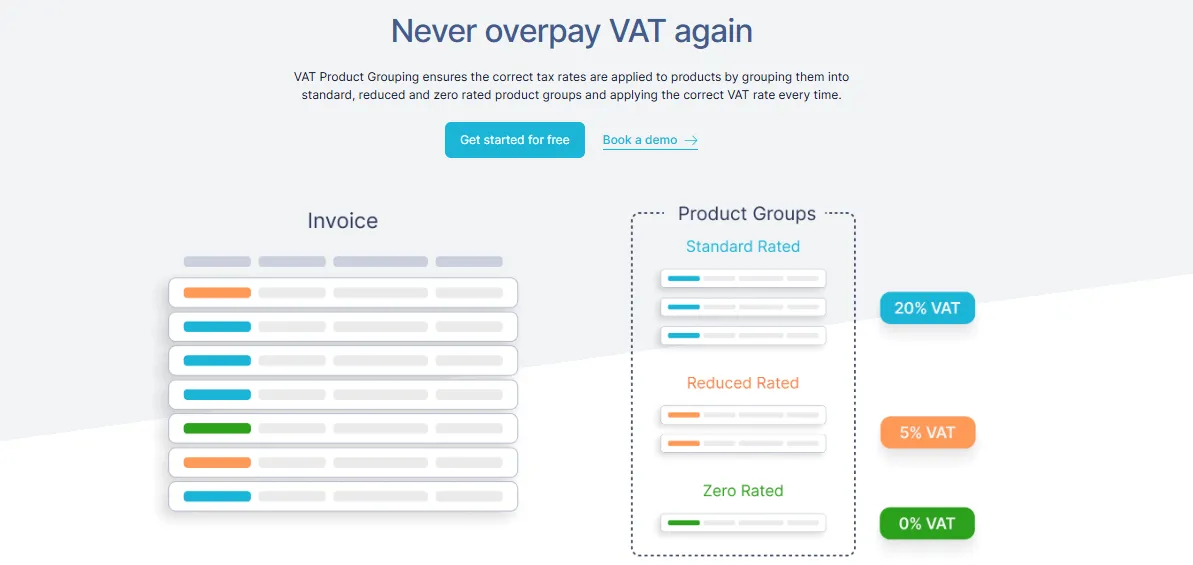
1. Split Sales by VAT Rate
If you’re selling in the UK or EU, you’ll need to group product sales by VAT type:
- Standard-rated (20%) – Most physical goods
- Reduced-rated (5%) – Children’s car seats, energy-saving products
- Zero-rated (0%) – Some food, books, and exports
To do this manually:
- Tag each product in your inventory with the correct VAT rate
- Export your sales by product report
- Sum totals by tax rate
This gets messy fast if you have a large catalog.
2. Identify Who Collected the Tax
If you sell in regions covered by marketplace tax laws (like EU OSS or US marketplace facilitator rules), Shopify may collect VAT on your behalf.
You’ll need to separate:
- Sales where you collected VAT
- Sales where Shopify or a third-party gateway collected it
This distinction matters for your VAT return, only the first group goes on your books.
3. Include Refund Adjustments
VAT must be adjusted for refunded orders. If you refunded a product taxed at 20%, you must reduce your VAT liability accordingly.
Again, Shopify won’t do this for you, you’ll need to extract refund data and map it back to the original tax category.
Or… Automate It with Link My Books
Instead of building custom spreadsheets, Link My Books automates all of this:
- Automatically applies Shopify VAT rates to each product using VAT Product Grouping
- Splits out Shopify-collected vs seller-collected tax for compliance
- Adjusts for refunds in the correct tax category
- Posts accurate VAT-ready summaries to Xero or QuickBooks
It takes less than 15 minutes to set up, and you’ll never overpay VAT again.
Why Do You Need a Shopify Sales by Product Report?
It’s tempting to focus only on total revenue, but knowing what you sold and how much you made on each product is where the real insight lies.
Here’s why your Shopify sales by product report is critical to running a smarter, more profitable business:
1. Track Your Best-Selling Products
Your top-line revenue doesn’t tell you which products are driving growth. A product sales report shows:
- Quantity sold per SKU
- Gross and net sales per item
- Discount and return rates
This helps you double down on what’s working and cut what’s not.
2. Optimize Inventory Planning
When you know which products sell best (and when), you can:
- Forecast demand more accurately
- Avoid overstocking or stockouts
- Streamline purchasing and fulfillment
Data-backed decisions = fewer dead SKUs and better cash flow.
3. Improve Profit Margins
By analyzing sales by product alongside fees, refunds, and taxes, you can spot hidden profit leaks:
- High return rates on certain items
- Products with low margins after fees
- SKUs affected by heavy discounting
This insight helps you price smarter and protect your margins.
4. Stay Compliant With VAT or Sales Tax
VAT can vary by product type and buyer location. If you sell in the UK, EU, or US, your product sales report is the foundation for:
- Applying the correct VAT rate
- Reporting tax by country
- Handling refunds and returns correctly
Without product-level visibility, compliance becomes guesswork, and that’s expensive.
FAQ: Shopify Sales by Product Report

What does “Sales by product” include and exclude?
This report shows gross sales, discounts, returns, net sales, taxes, shipping, and duties for each product SKU - but it doesn’t include gateway fees or payouts.
How often is the report updated?
Shopify updates sales data in near real time (within ~1 minute), but views like “Sales by discount” can take 12–72 hours to refresh.
Can I view data by variant, vendor, or type?
Absolutely. Shopify lets you switch to "Sales by product variant", "Sales by vendor", or "Sales by product type" reports, each breaks down the data differently for deeper analysis.
Does the product report include POS (in-store) sales?
No. POS data appears separately in Retail sales reports, which exclude shipping and treat taxes differently.
Will deleted products or orders still appear in the report?
If you delete a product, order, or variant, its data is removed from all reports. Test or draft orders aren’t included either.
Why do my ‘Sales by product’ totals differ from my Shopify payouts?
That’s because exports don’t account for fees, gateway charges, or payout timing. Reports show sales value, not actual bank transfers—that’s why reconciliation is manual unless automated.
Can I filter by collection, tag, or country?
Yes. Using Shopify’s newer analytics or third-party apps, you can filter or segment by collections, product tags, or customer location to analyze performance across categories and regions.
How should I use this report for VAT or tax filing?
Tag products with correct VAT rates, export the sales report, then manually group sales, VAT amounts, and adjustments (like refunds) by rate. Or, use Link My Books to automate rate mapping, refund handling, and post-ready entries for Xero/QuickBooks.
What’s the best cadence to check this report?
Weekly checks help you react quickly to trends. For VAT or monthly accounting, a monthly review is essential. If you run a high-volume store, consider exporting daily snapshots.
How Link My Books Makes Accounting for Shopify a Breeze
Pulling a Shopify product sales report is one thing, turning it into clean books is another.
Most sellers download CSVs, send them to their accountant, and hope for the best. But that approach leads to delays, errors, and often VAT overpayments.
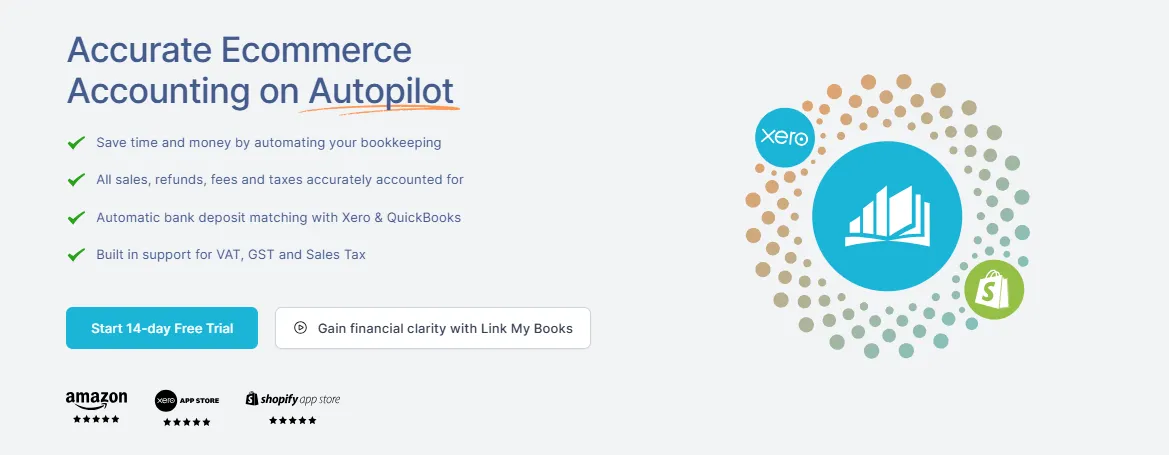
Link My Books connects your store directly to Shopify accounting software, automatically creating VAT-ready summaries that reconcile to the penny with your bank deposits.
Every sale, fee, refund, and tax is categorized and posted with the right tax code.
Here’s what you get:
- Payout Reconciliation: Link My Books matches your Shopify payouts to your bank deposits, splitting out sales, fees, and tax.
- Automated VAT Mapping: VAT rates are applied automatically based on product type and buyer location - ideal for UK and EU sellers using schemes like OSS.
- Works With PayPal, Klarna, and More: It supports all major Shopify gateways, not just Shopify Payments.
- Clean Integration with Xero & QuickBooks: Sync daily, weekly, or monthly summaries that post directly to your chart of accounts.
- Fast Setup: Get started in under 15 minutes with guided tax mapping and account setup.
Spend less time fixing spreadsheets and more time growing your store.
👉 Start your free 14-day trial today and see how effortless Shopify accounting can be.


.png)