

Recording Shopify sales in Xero is one of the biggest time drains for ecommerce sellers. Every payout from Shopify includes a mix of sales, refunds, fees, discounts, and VAT - and when you try to push that into Xero manually, it quickly becomes messy. Most sellers end up juggling multiple CSV exports, guessing at VAT treatment, and spending hours each month just trying to make payouts line up with their bank feed.
The result: wasted time, inaccurate books, and compliance risks if VAT or sales tax is applied incorrectly. Manual recording might seem manageable at first, but as sales grow, it becomes unscalable.
That’s why automation is now the preferred route for Shopify sellers who want to save time and prevent costly mistakes.
Key Takeaways from this Post
Shopify payouts include sales, refunds, discounts, fees, and taxes that rarely match your bank feed without adjustments.
Trying to reconcile these manually in Xero is slow and error-prone, especially when VAT or international tax rules are involved.
Link My Books automates this entire process, importing clean Shopify summaries into Xero or QuickBooks, applying the right tax codes, and reconciling payouts in one click.


Where Most Sellers Go Wrong with Recording Shopify Sales in Xero
Most Shopify sellers underestimate how complex recording sales in Xero can be. On the surface, it looks simple: export your sales data, upload it into Xero, and reconcile with your payouts. In practice, that’s where mistakes creep in:
- Mismatched payouts: Shopify transfers lump sums to your bank account, but each payout includes dozens (sometimes hundreds) of orders, refunds, discounts, and fees. Without breaking this down properly, the numbers in Xero won’t match your bank feed.
- VAT and sales tax errors: Sellers often apply flat VAT rates across all orders, ignoring whether Shopify already collected tax on their behalf or if an order was exempt. This leads to overpaying or underreporting taxes - a risk that can trigger compliance issues.
- Double-counting revenue: Some sellers record gross sales as income in Xero but fail to net out refunds and Shopify fees correctly, inflating revenue figures and skewing profit margins.
- Manual data entry risks: Entering transactions line by line into Xero is time-consuming and highly prone to errors, especially for sellers scaling into thousands of monthly orders.
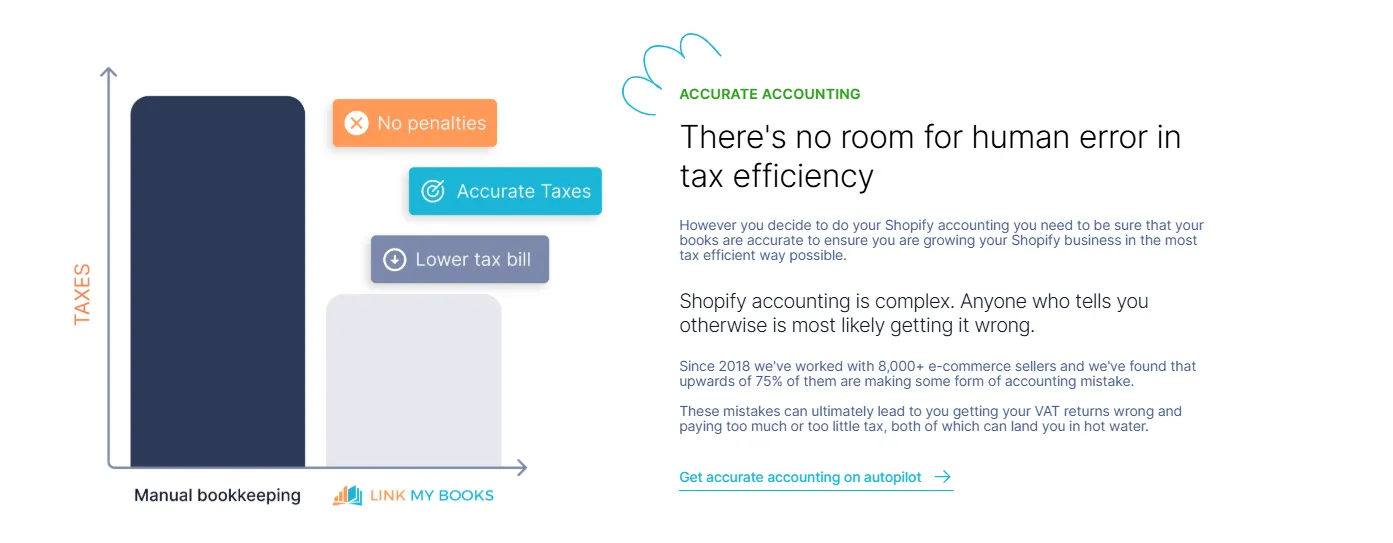
These errors cost more than time. They can distort your profit and loss statements, make it harder to track cash flow, and increase the chance of tax penalties. That’s why the smartest Shopify sellers turn to automation.
How to Record Shopify Sales in Xero (the Easy Way with Link My Books)
If you’re using Link My Books, you don’t need to spend hours exporting reports or worrying about VAT treatment. The integration takes care of the heavy lifting by pulling your Shopify data directly into Xero in clean, reconciled summaries.
Here’s how it works:
- Connect Shopify and Xero
- Use the Setup Wizard to Map Accounts
- Apply the Guided Tax Wizard
- Choose Your Sync Mode
- Reconcile Payouts in One Click
Step #1: Connect Shopify and Xero
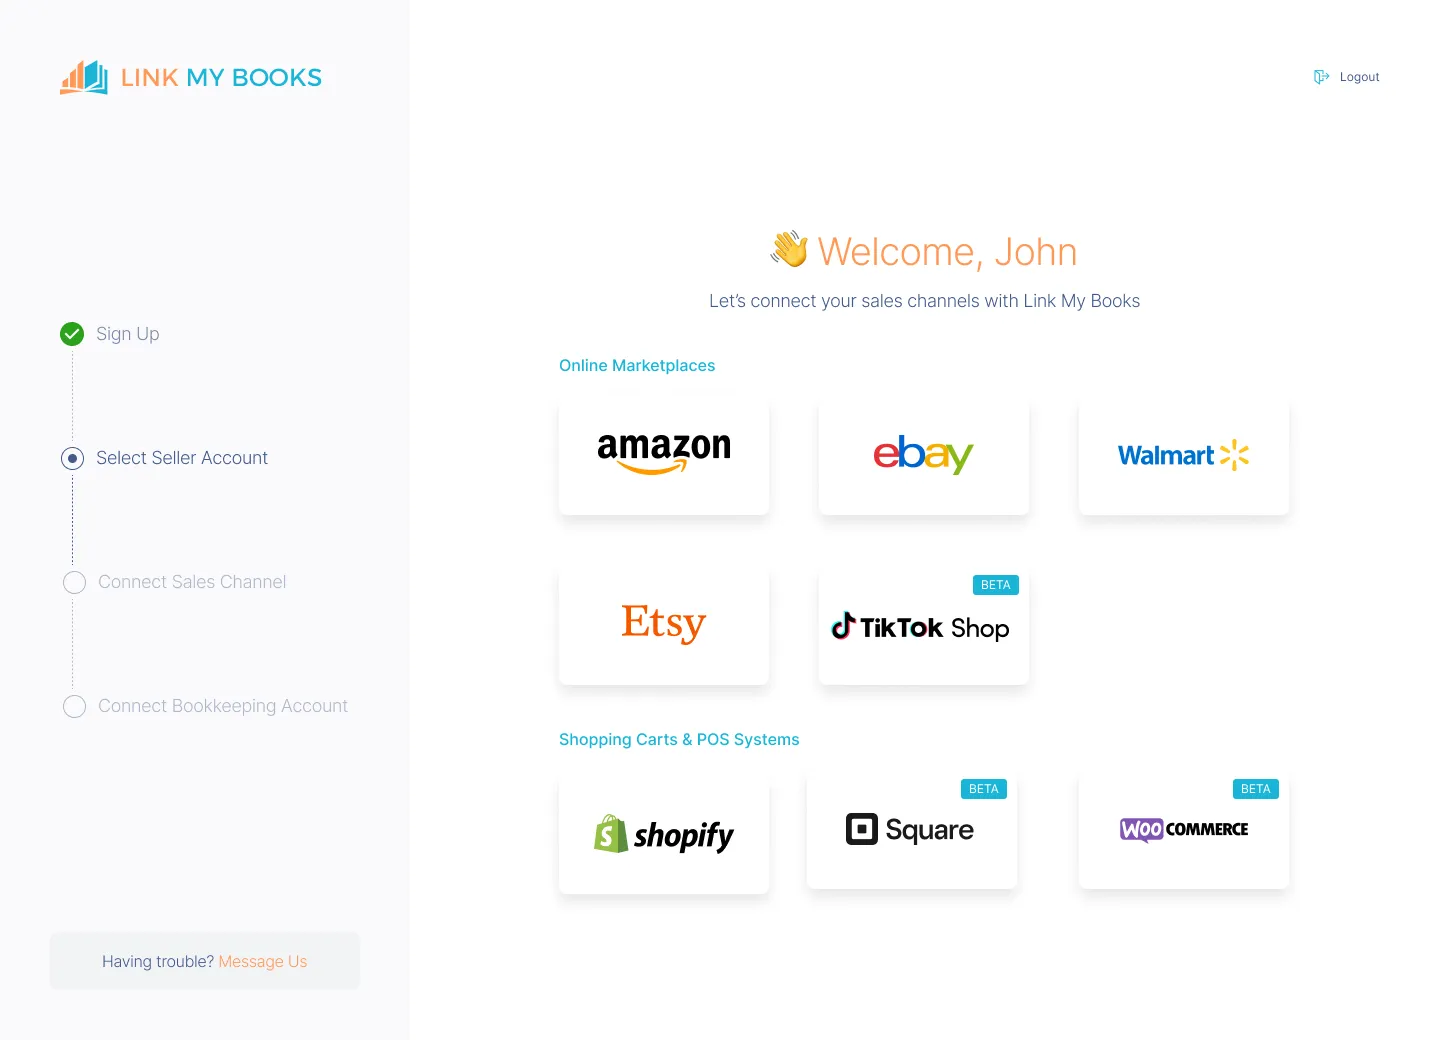
- Sign up for a free 14-day trial of Link My Books.
- Connect your Shopify store and Xero account in a few clicks.
- Link My Books will start pulling in your Shopify payouts automatically.
Step #2: Use the Setup Wizard to Map Accounts
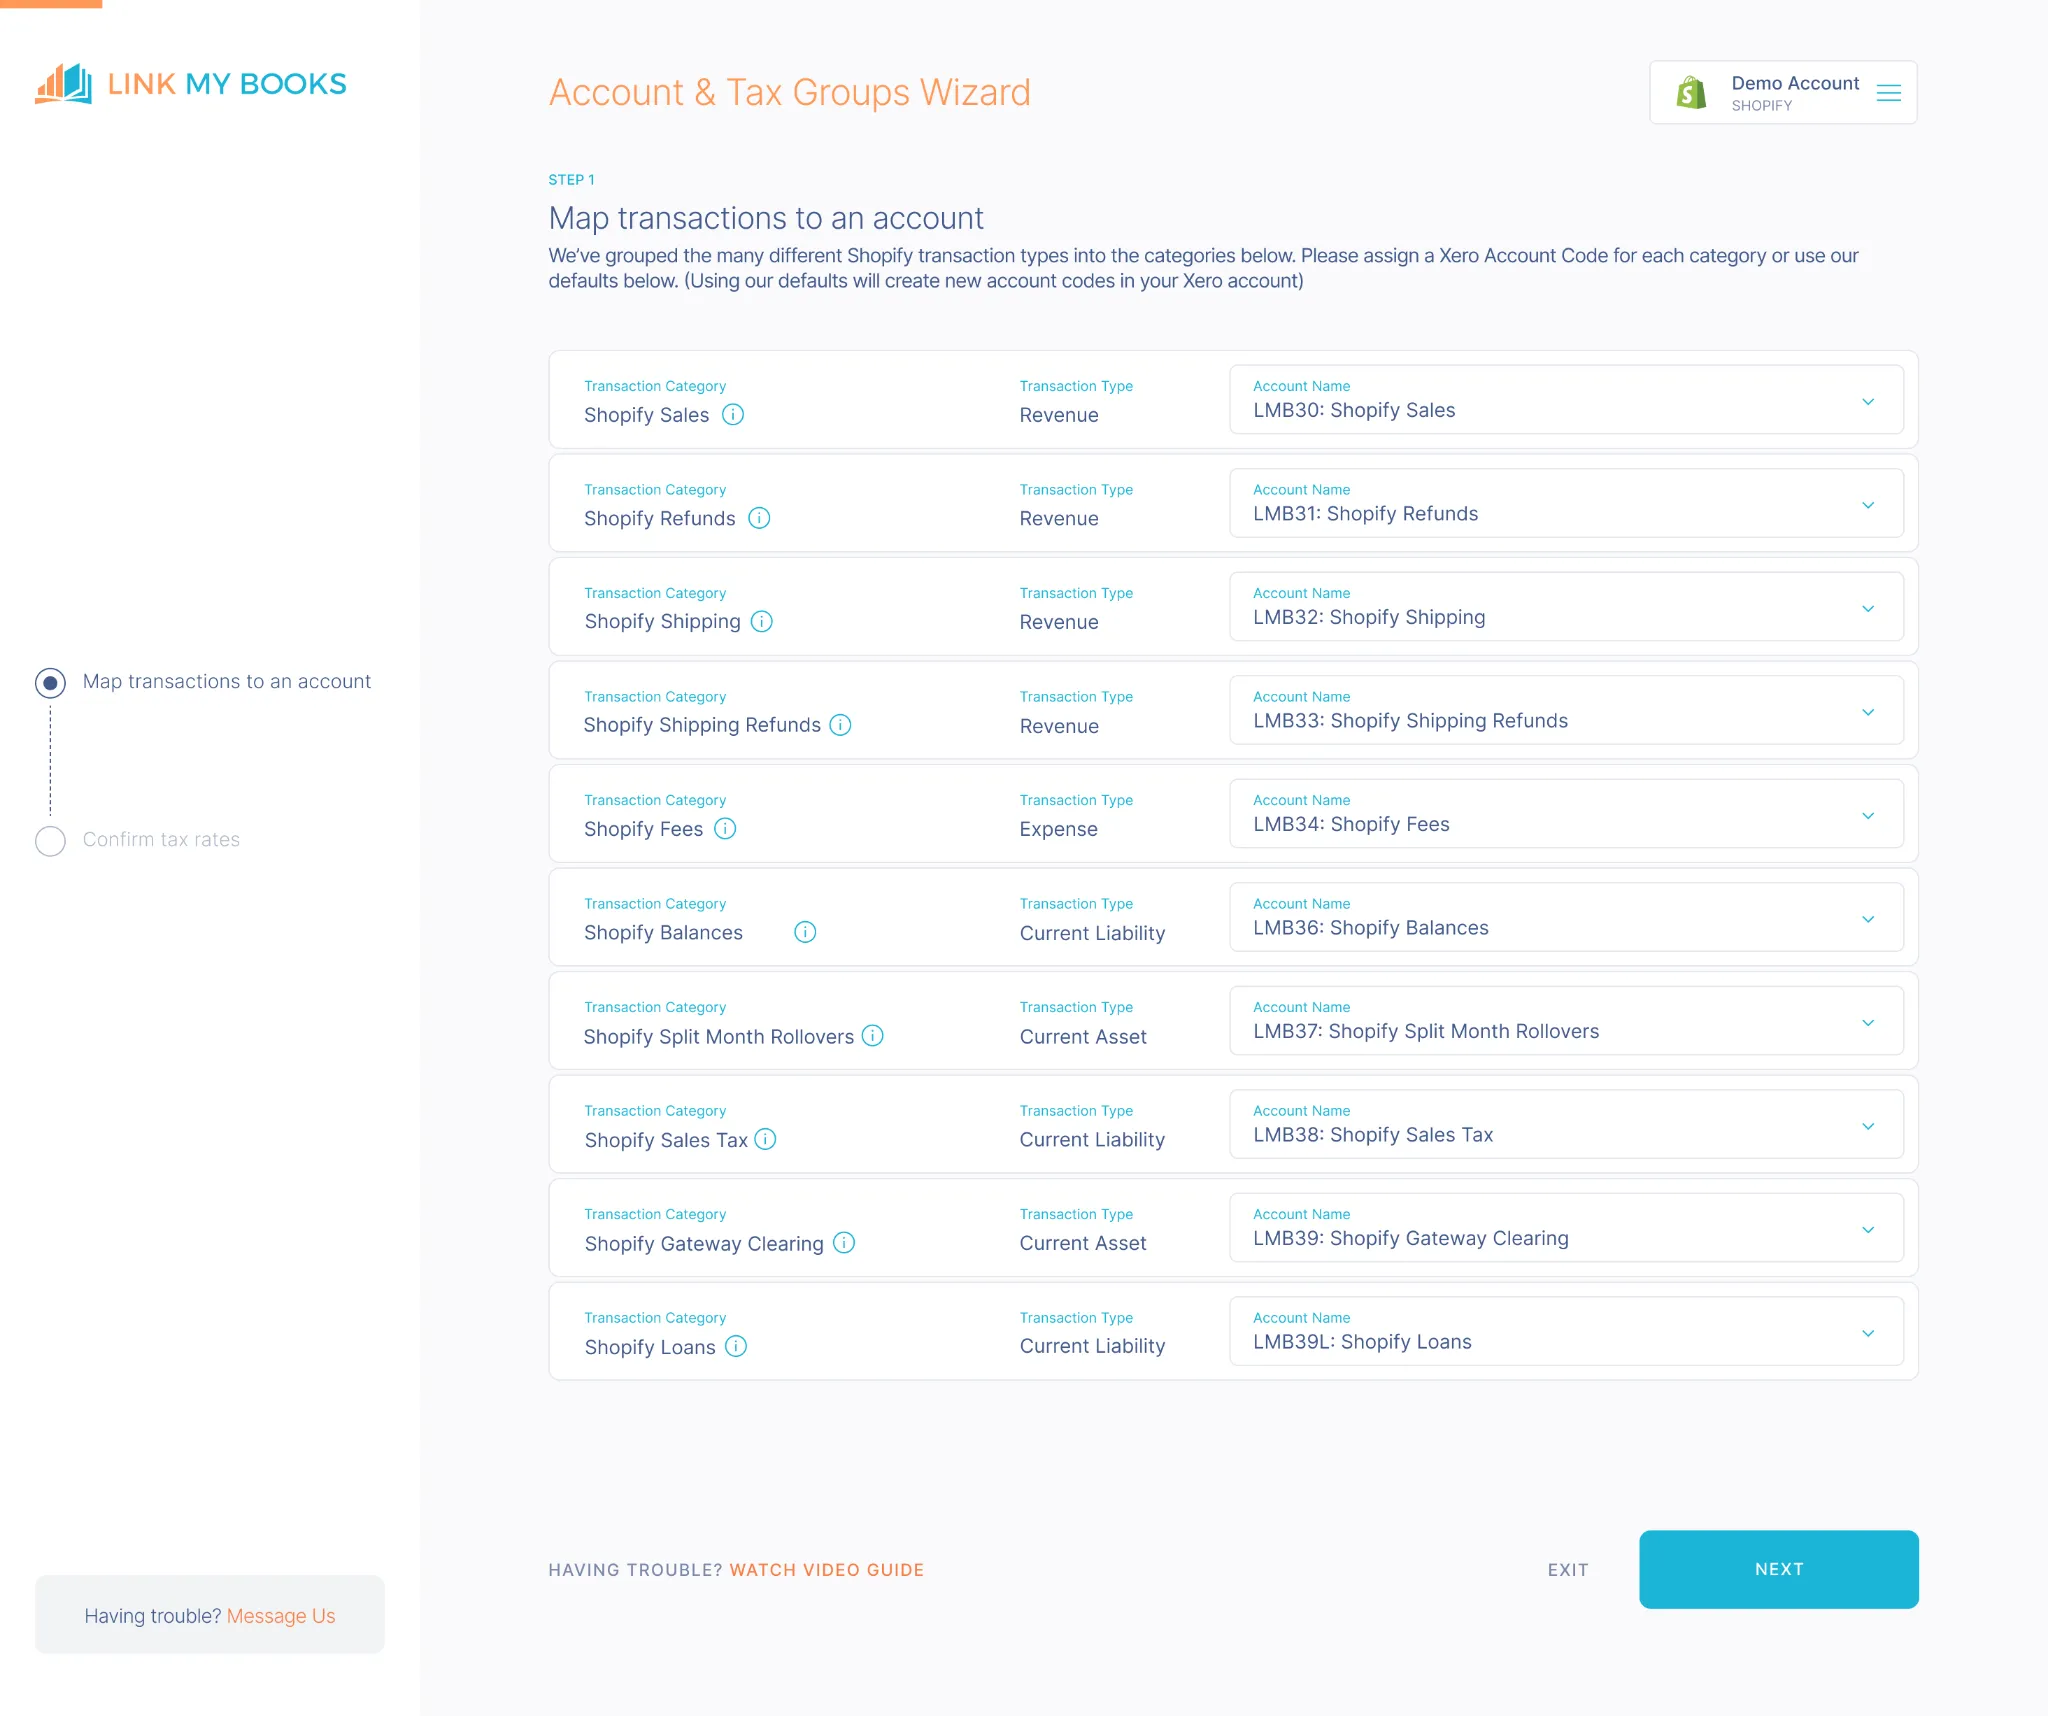
The setup wizard walks you through mapping Shopify data into Xero:
- Sales revenue → Income account
- Shopify fees (transaction, processing, subscription, ads) → Expense account
- Refunds and discounts → Adjustments account
- Shipping income → Income account
Instead of guessing, Link My Books suggests best-practice mappings designed for ecommerce bookkeeping.
Step #3: Apply the Guided Tax Wizard
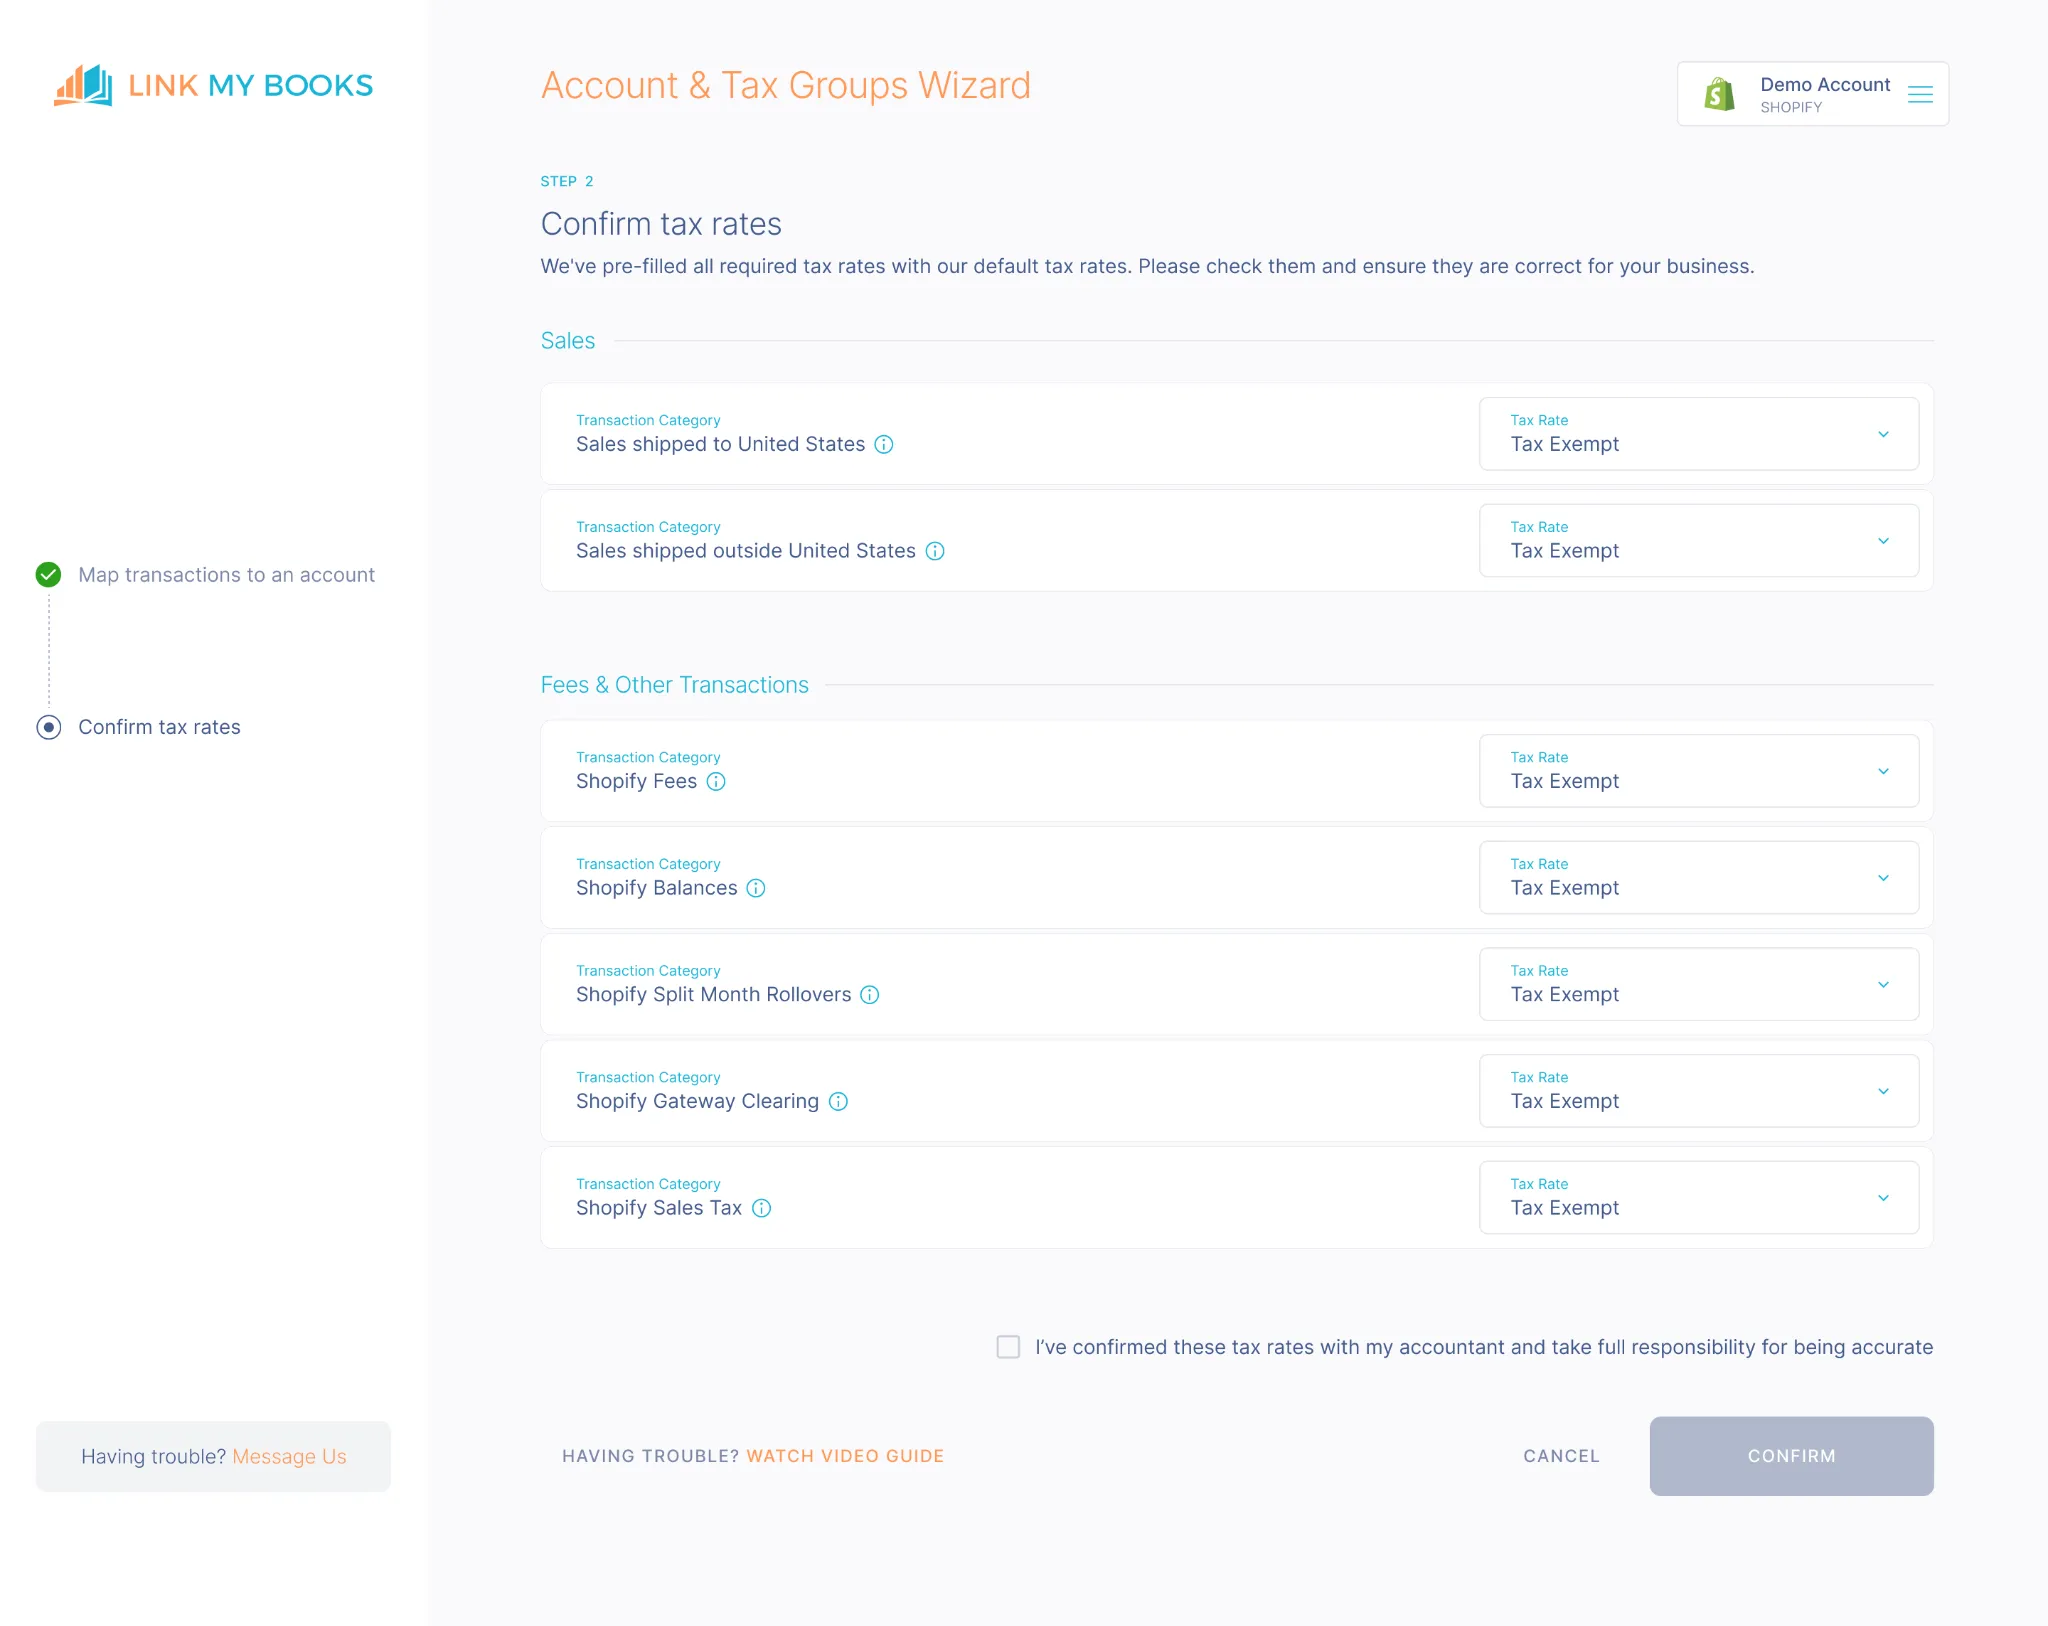
Tax handling is automated:
- Correct VAT or sales tax codes are applied based on customer location.
- Shopify-collected taxes (like EU OSS or US marketplace rules) are separated, so you don’t double-report.
- UK, EU, and international zero-rated sales are all handled correctly.
This keeps your compliance airtight and prevents overpaying VAT.
Step #4: Choose Your Sync Mode
Decide how you want payouts to post into Xero:
- Manual Sync: Send summary invoices one at a time.
- AutoPost: Automatically post every new Shopify payout from a chosen start date.
Most sellers use AutoPost to keep their books updated without lifting a finger.
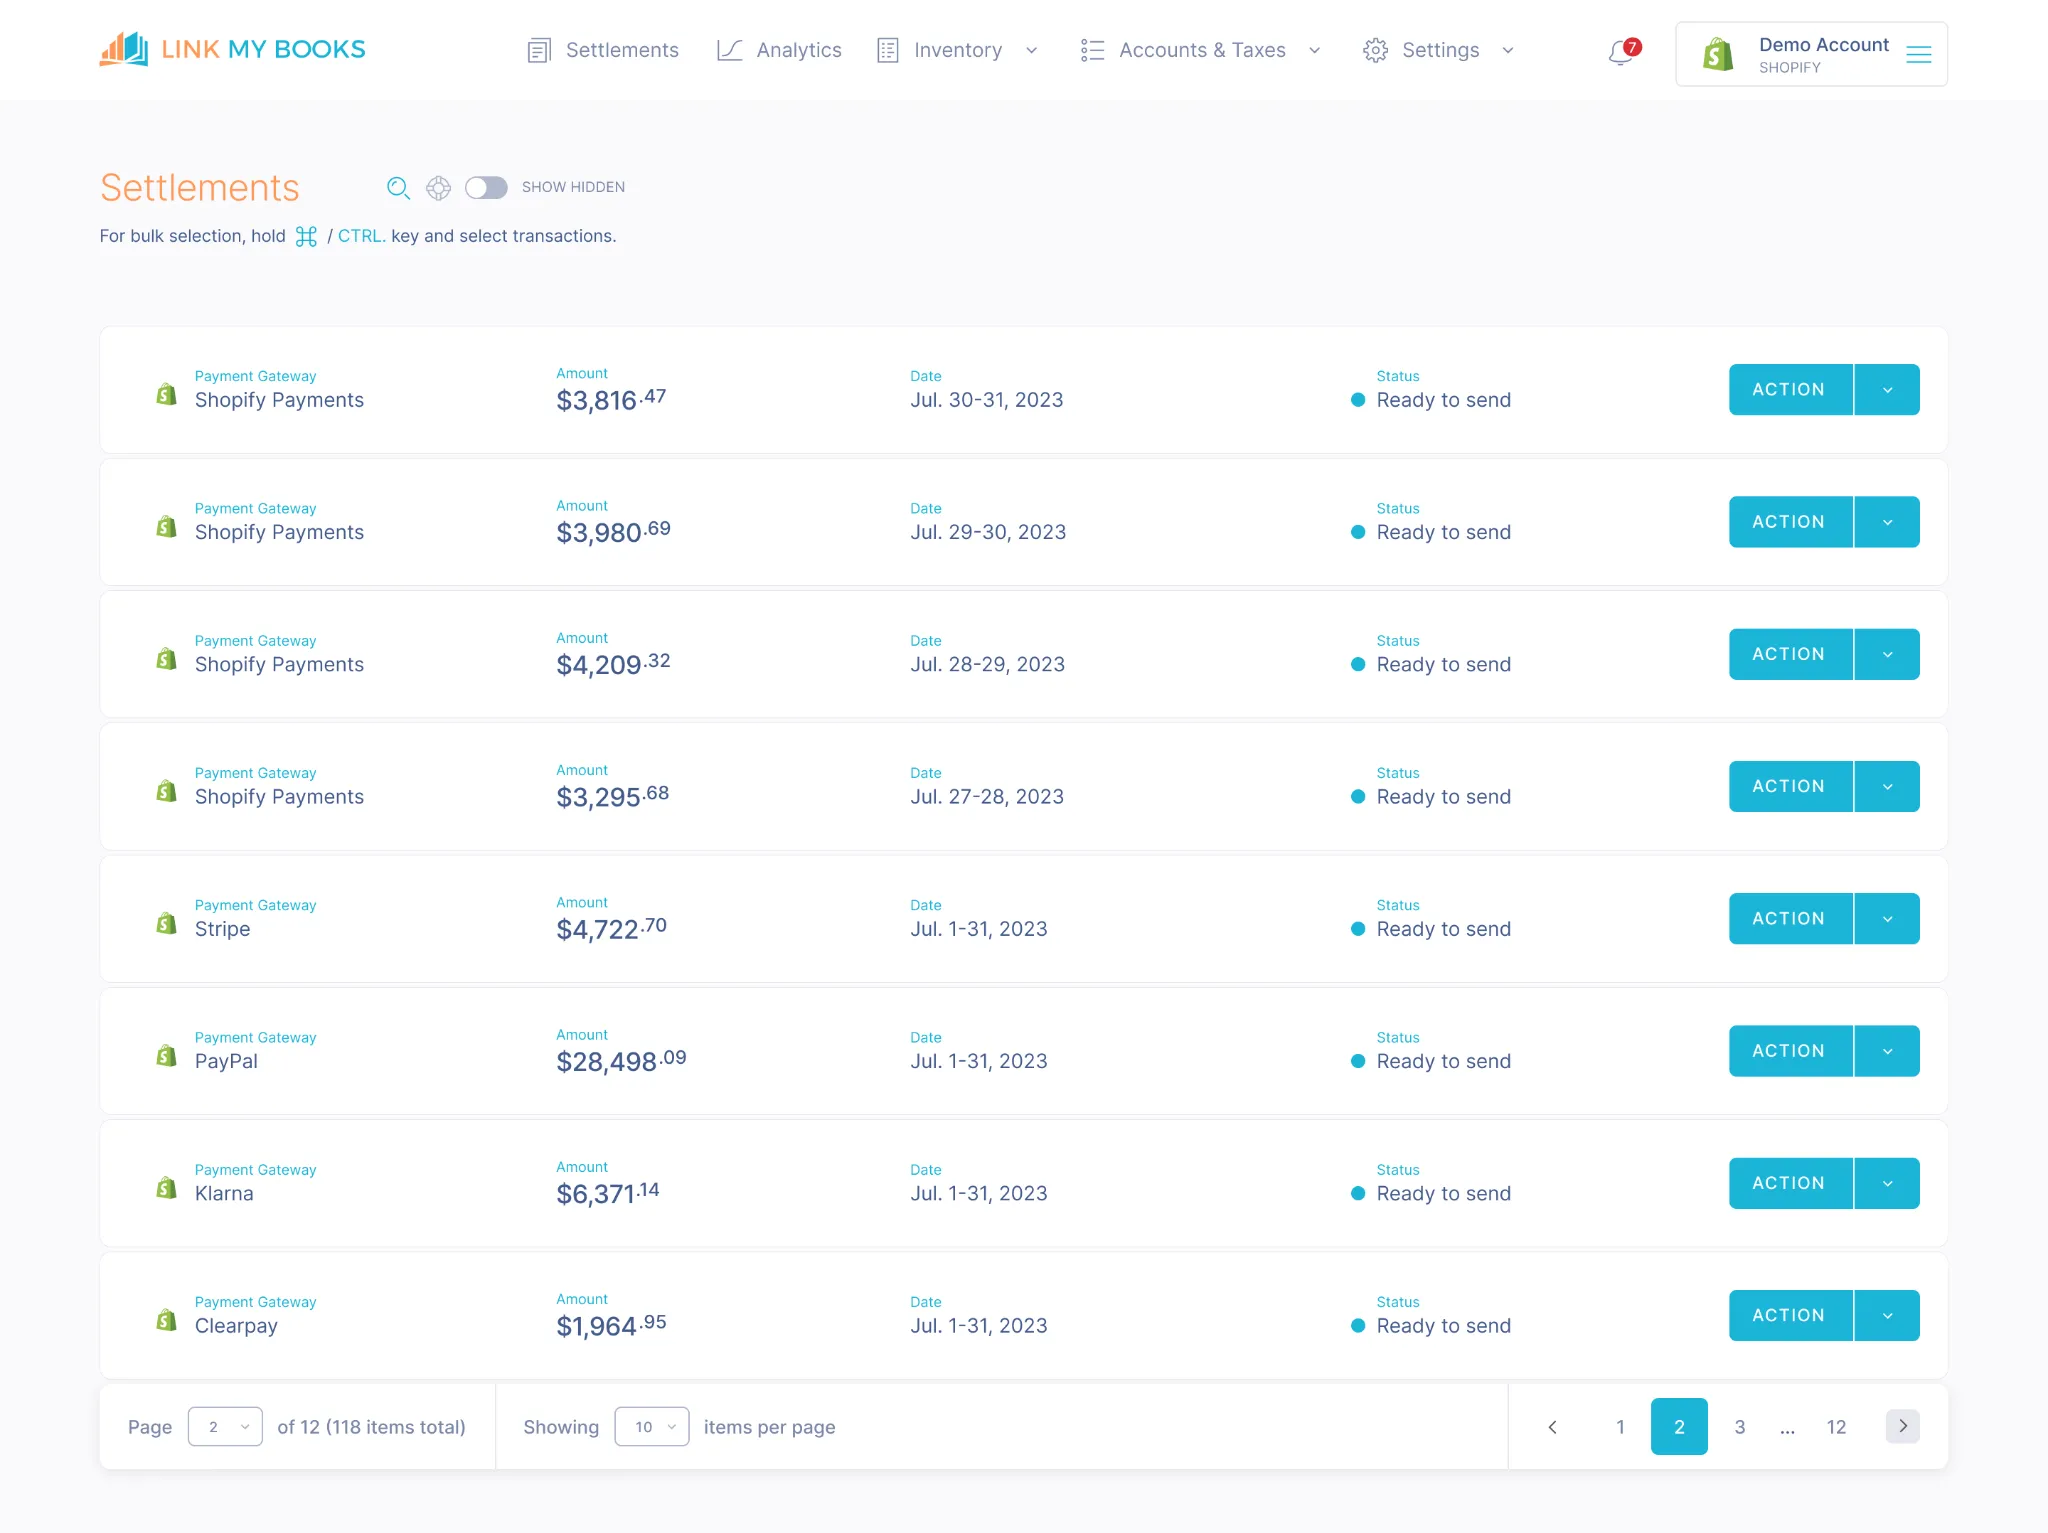
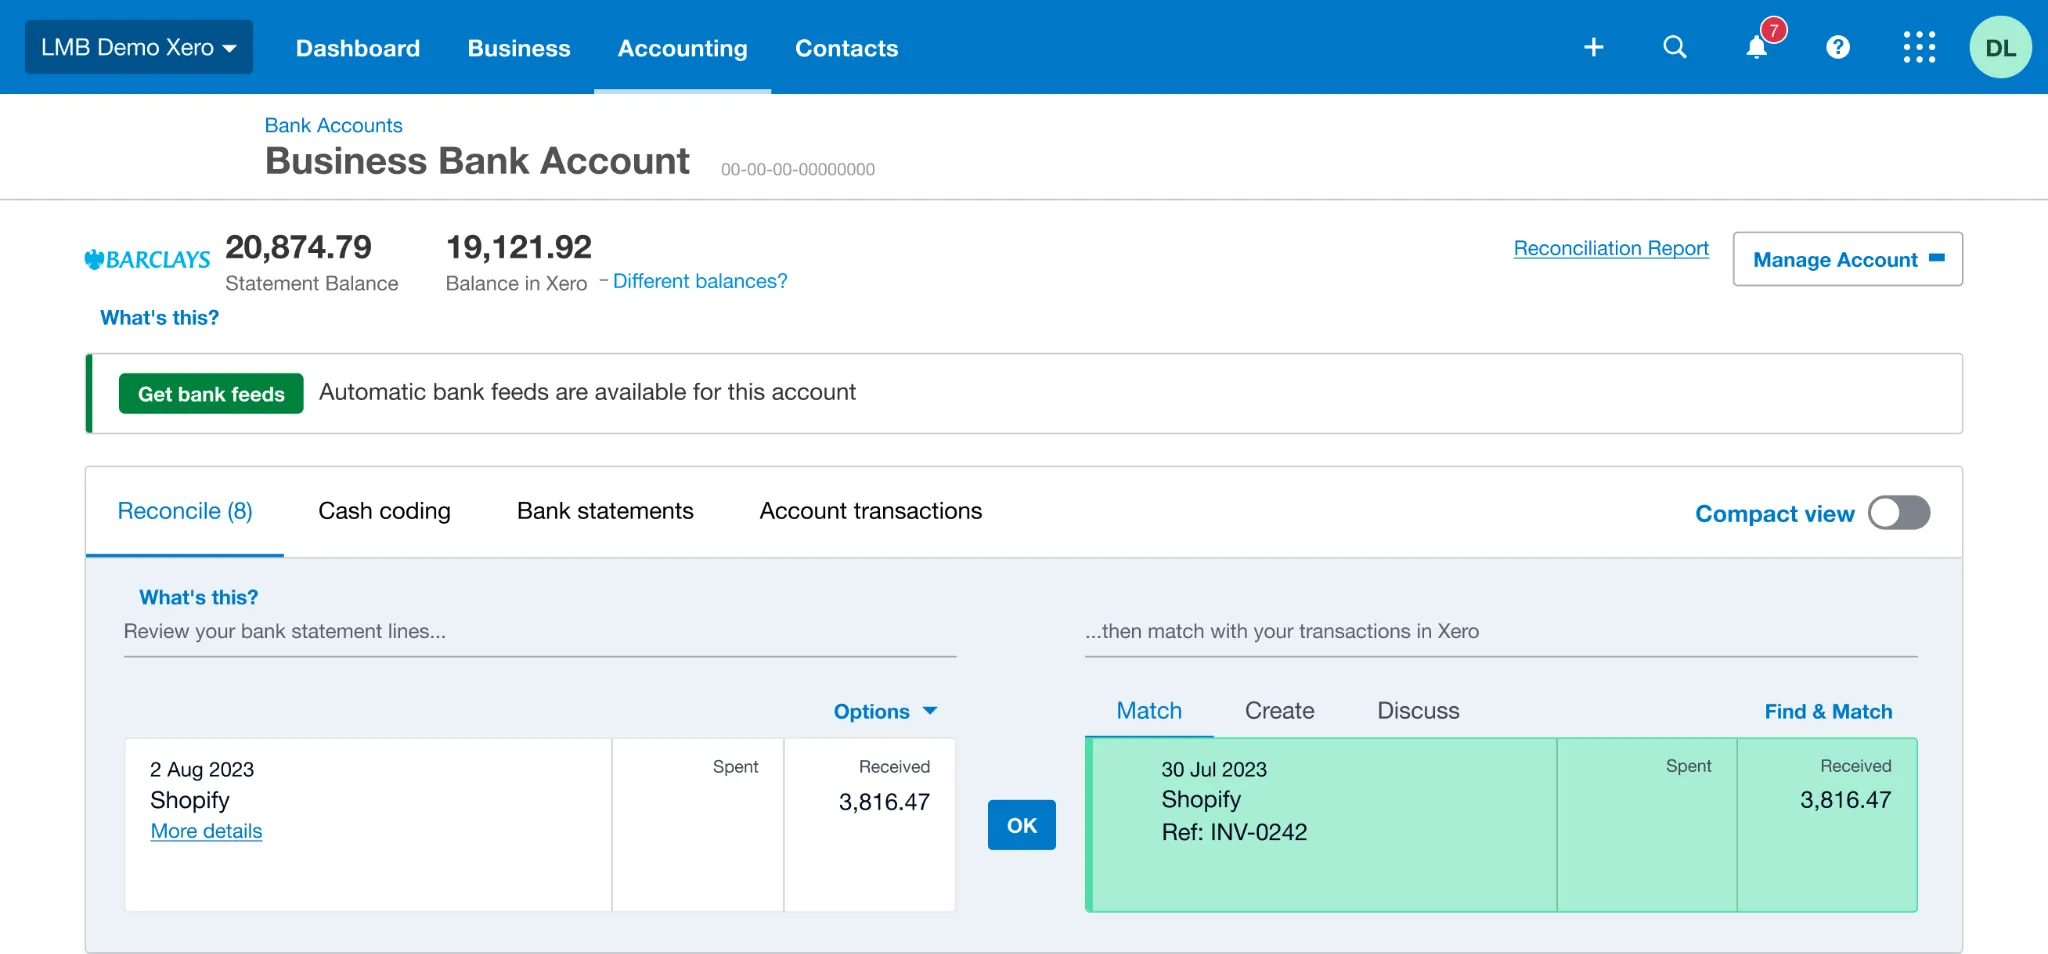
Step #5: Reconcile Payouts in One Click
Each Shopify payout is summarized into a clean invoice in Xero that:
- Breaks down sales, fees, refunds, and taxes.
- Matches perfectly to the net deposit in your bank feed.
- Requires no manual adjustments.
You simply click “Reconcile” and you’re done.
You can see what Link My Books can do for your Shopify business for free, with our 14-day trial!
If you still want to record Shopify sales in Xero the hard way.
Here’s the process sellers typically follow:
How to Record Shopify Sales in Xero Manually
If you’re not using automation, you’ll need to record Shopify sales in Xero the hard way. Here’s the process sellers typically follow:
- Download your Shopify sales report
- Enter sales into Xero
- Apply VAT and sales tax rules
- Match payouts to your bank feed
- Reconcile and adjust
Step #1: Download Your Shopify Sales Report
To get started, you’ll need to export the raw sales data from Shopify:
- Log in to Shopify Admin: Go to your store’s backend
- Navigate to Finances → Payouts: This section shows all transactions tied to Shopify Payments
- Choose your date range: Select the period you want to reconcile (monthly is best for VAT and bookkeeping)
- Export your report: Click Export and choose CSV format
Your CSV will include:
- Sales revenue
- Refunds
- Discounts
- Shopify fees (transaction, processing, subscription)
- Net payout
This file is the foundation for entering figures into Xero.
Step #2: Enter Sales into Xero
Next, you’ll need to record Shopify data in Xero manually:
- Create a sales invoice (or journal entry) in Xero for the gross sales total
- Deduct refunds so revenue matches reality
- Enter Shopify fees (processing, subscriptions, app charges, ad spend) as expenses
- Adjust for discounts and shipping income so they appear in the correct accounts
This ensures that Shopify’s raw data gets categorized properly in your Xero chart of accounts.
Step #3: Apply VAT and Sales Tax Rules
Tax handling is where many sellers make mistakes. To do this manually:
- Identify sales where Shopify collected tax on your behalf (e.g., EU OSS or US marketplace facilitator rules). These should not be included in your VAT return
- Separate UK VAT standard, reduced, and zero-rated sales
- Mark exports outside the UK/EU as zero-rated, but keep evidence (shipping docs)
- Apply the correct tax codes in Xero for each category
If you skip this step, you risk overpaying VAT or misreporting compliance data.
Step #4: Match Payouts to Your Bank Feed
Shopify transfers lump sums to your bank account, usually every few days. To reconcile:
- Open your bank feed in Xero.
- Compare each Shopify payout (from your CSV) with the corresponding bank deposit.
- Note that payouts rarely equal gross sales, since Shopify deducts fees and refunds first.
This step helps you tie sales activity back to real cash flow.
Step #5: Reconcile and Adjust
Finally, you’ll need to create adjustments so your figures match:
- Post your sales, fees, refunds, and tax lines to the correct accounts.
- Confirm that your Shopify payout summary equals the net deposit in your bank feed.
- If figures don’t match, look for missing refunds, incorrect tax codes, or fees not accounted for.
Once everything ties out, you can mark the transactions as reconciled in Xero.
How Link My Books Makes Recording Shopify Sales in Xero Automatic & Easy
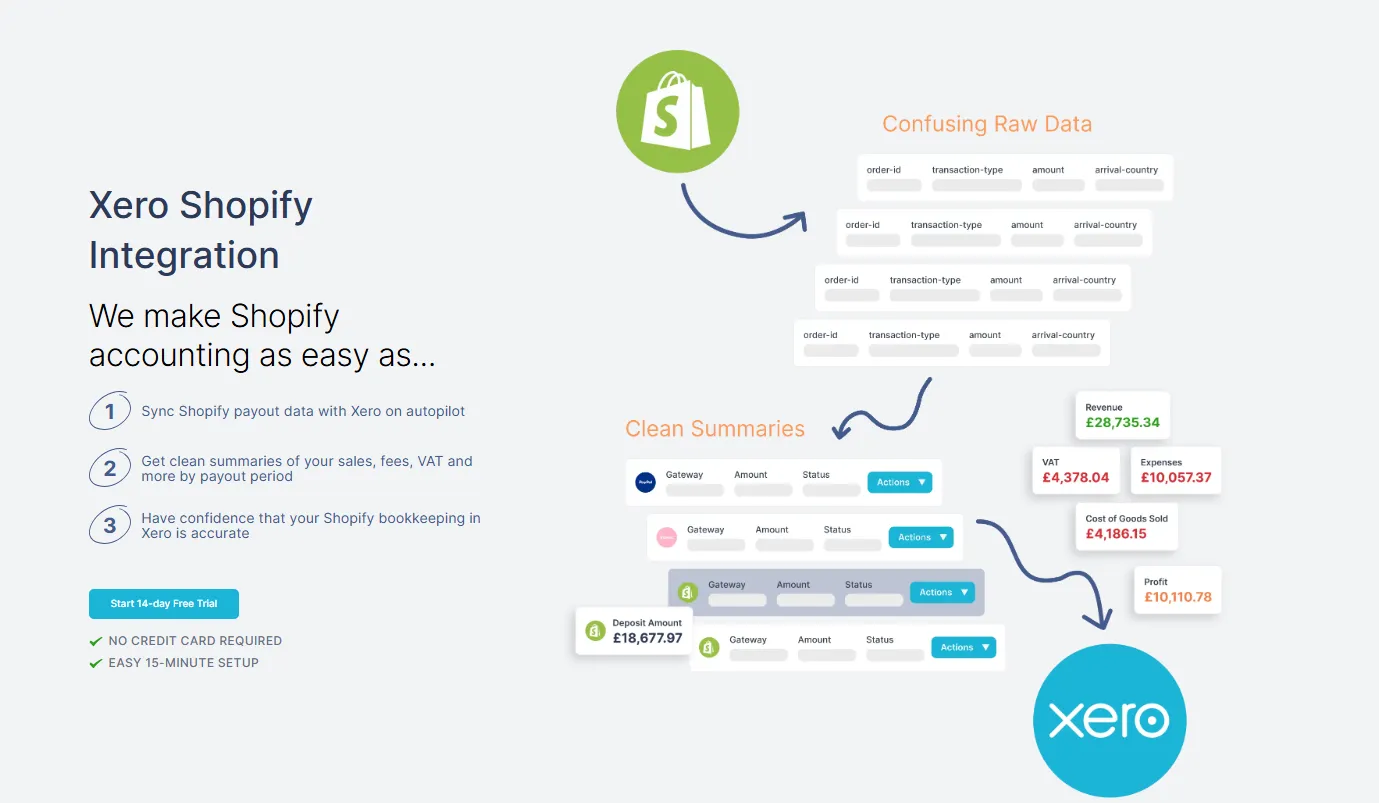
Manually entering Shopify sales into Xero takes hours and leaves too much room for mistakes. Link My Books removes the friction by working in the background to keep your accounts clean and accurate. Once connected, it transforms your Shopify payouts into reconciled summaries that line up perfectly with your bank feed.
Here’s what you can expect:
Automatic Payout Reconciliation
Every Shopify payout is imported, summarized, and matched to your Xero bank feed in one click. Even when multiple fees, refunds, or discounts are involved, the numbers always tie out.
Accurate Tax Handling
VAT and sales tax are where most sellers go wrong. Link My Books applies the right tax codes automatically, separating out Shopify-collected taxes from those you’re responsible for. Whether it’s UK VAT, EU OSS, or zero-rated exports, you stay compliant without double-reporting.
Clear Breakdown of Fees and Refunds

Shopify charges multiple fees - payment processing, subscriptions, app charges, ads, and more. Link My Books splits these out automatically, so you can see exactly how much you’re paying and track profitability with confidence.
Time-Saving Automation

What used to take hours every month is reduced to just a few clicks. Sellers and accountants save time, avoid errors, and gain a reliable financial picture to make smarter decisions.
With Link My Books, you can reconcile Shopify sales in Xero in minutes, not hours - and focus on running your store instead of fixing spreadsheets.
How to Categorize Shopify in Xero
Even when using automation, it’s important to understand how Shopify transactions should flow into your chart of accounts in Xero. This ensures your financial reports are accurate and easy to interpret.
Here’s how most Shopify sellers categorize their data:
- Sales revenue: Gross sales amounts should go to an Income account in Xero.
- Refunds and discounts: These reduce your gross sales, so they’re typically mapped against a Contra Income or Refunds account.
- Shopify fees: Payment processing fees, subscription charges, and app-related costs should be mapped to an Expense account such as “Shopify Fees” or “Merchant Fees.”
- Shipping income: If you charge customers for shipping, this should be mapped to a separate Income account.
- Sales tax / VAT collected: Any tax collected by Shopify on your behalf should flow into a Liability account, ready for remittance.
With Link My Books, these mappings are handled during setup, and the system even suggests best-practice defaults for ecommerce sellers. If you’re recording sales manually, double-check your mappings with an accountant to avoid inflating income or misclassifying expenses.
FAQ

How do I handle VAT for Shopify sellers in Xero?
VAT can be tricky because Shopify may collect and remit tax on your behalf in certain regions. For UK and EU sellers, you’ll need to separate sales where VAT is your responsibility from those covered by Shopify. Tools like Link My Books apply these rules automatically, so you stay compliant without overpaying. Read our full guide on VAT for Shopify sellers.
What’s the best way to manage Shopify seller bookkeeping?
Manual bookkeeping can take hours every month, especially if you’re exporting multiple reports. Using automation software like Link My Books allows you to sync payouts, fees, refunds, and VAT directly into Xero, saving time and preventing errors. Learn more in our guide to Shopify seller bookkeeping.
Where can I find my Shopify sales report?
Shopify sales reports are available under Finances → Payouts in your admin dashboard. You can export them in CSV format for manual bookkeeping. But if you connect Shopify to Link My Books, your reports sync automatically with Xero. Check out our guide to the Shopify sales report.
What’s the best Shopify accounting software?
The best option depends on your sales volume and how many platforms you sell on. Xero is a strong choice for ecommerce, especially when paired with automation tools like Link My Books. Read our comparison of the best Shopify accounting software.
How does Shopify Xero integration work?
There are several ways to connect Shopify to Xero. The native integration is limited and often requires manual adjustments. Link My Books provides a cleaner connection, automatically summarizing and posting payouts that reconcile perfectly. Learn more about Shopify Xero integration.
How do I reconcile Shopify payments in Xero?
To reconcile manually, you need to compare each Shopify payout to your bank feed and create adjustments for fees, refunds, and taxes. With Link My Books, reconciliation is instant: payouts in Shopify match your Xero bank feed in one click. See our guide on reconciling Shopify payments in Xero.
Simplify Shopify Bookkeeping with Link My Books
Manually recording Shopify sales in Xero is time-consuming, error-prone, and risky when VAT or sales tax is involved. Link My Books automates the entire process - syncing sales, fees, refunds, and taxes into Xero with perfect accuracy. Each payout is summarized, reconciled in one click, and supported by clean records your accountant will love.

👉 Start your free 14-day trial of Link My Books today and see how easy Shopify bookkeeping can be.


.webp)


.png)